
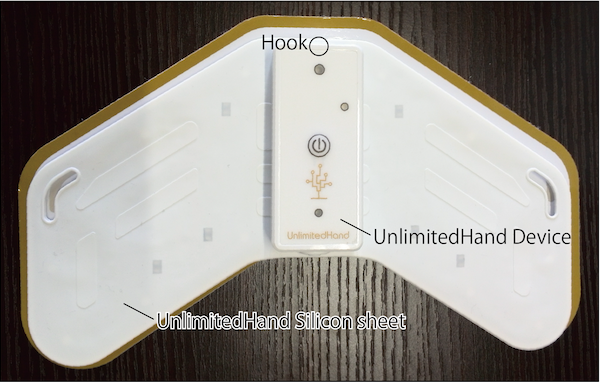
Hackable Port
What are Hackable ports?
What are Hackable ports?

we now introduce the other secret one, the ICSP port. In fact, it has been kept a secret up till now.
Getting started with the hackable ICSP port
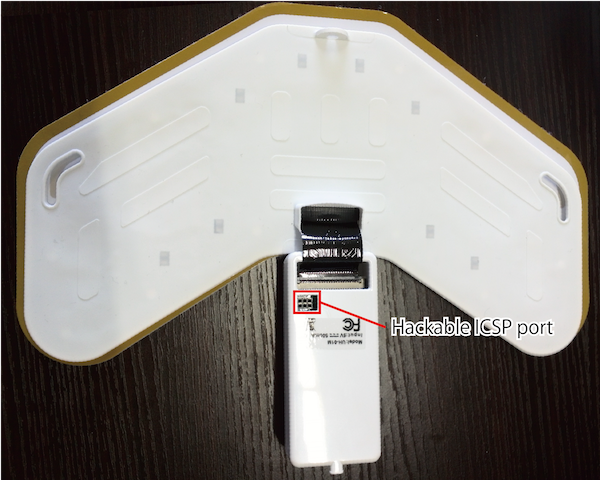
Let's Hack your UnlimitedHand through ICSP
STEP 1. What you will need
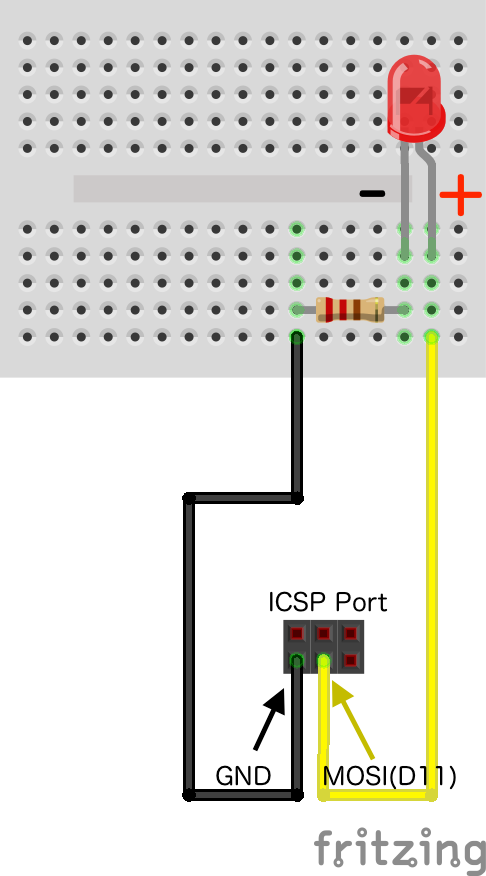
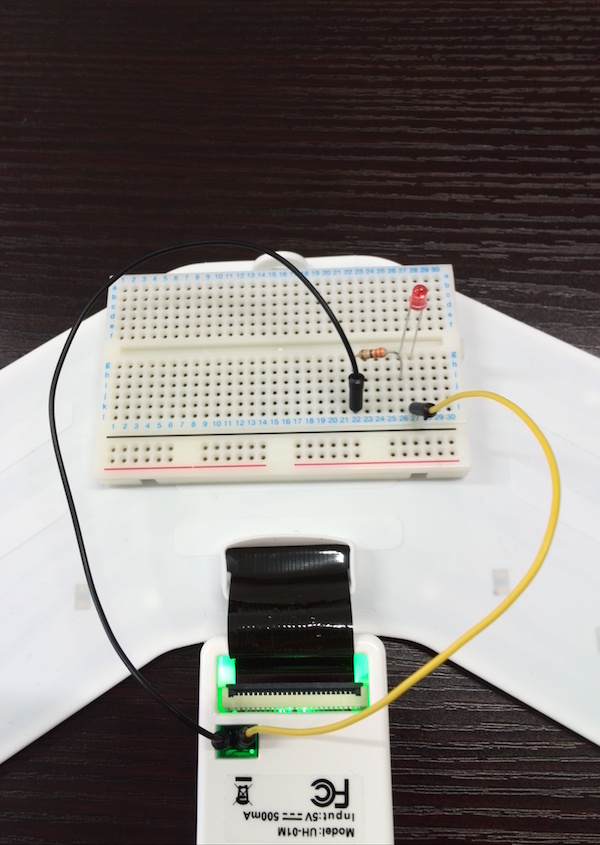
STEP 2. Hardware Hookup

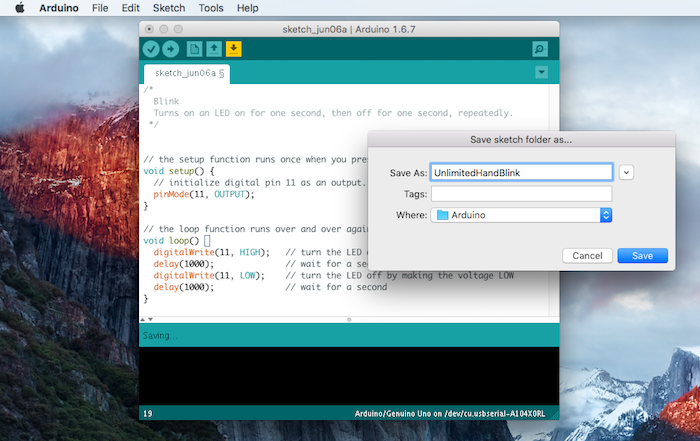
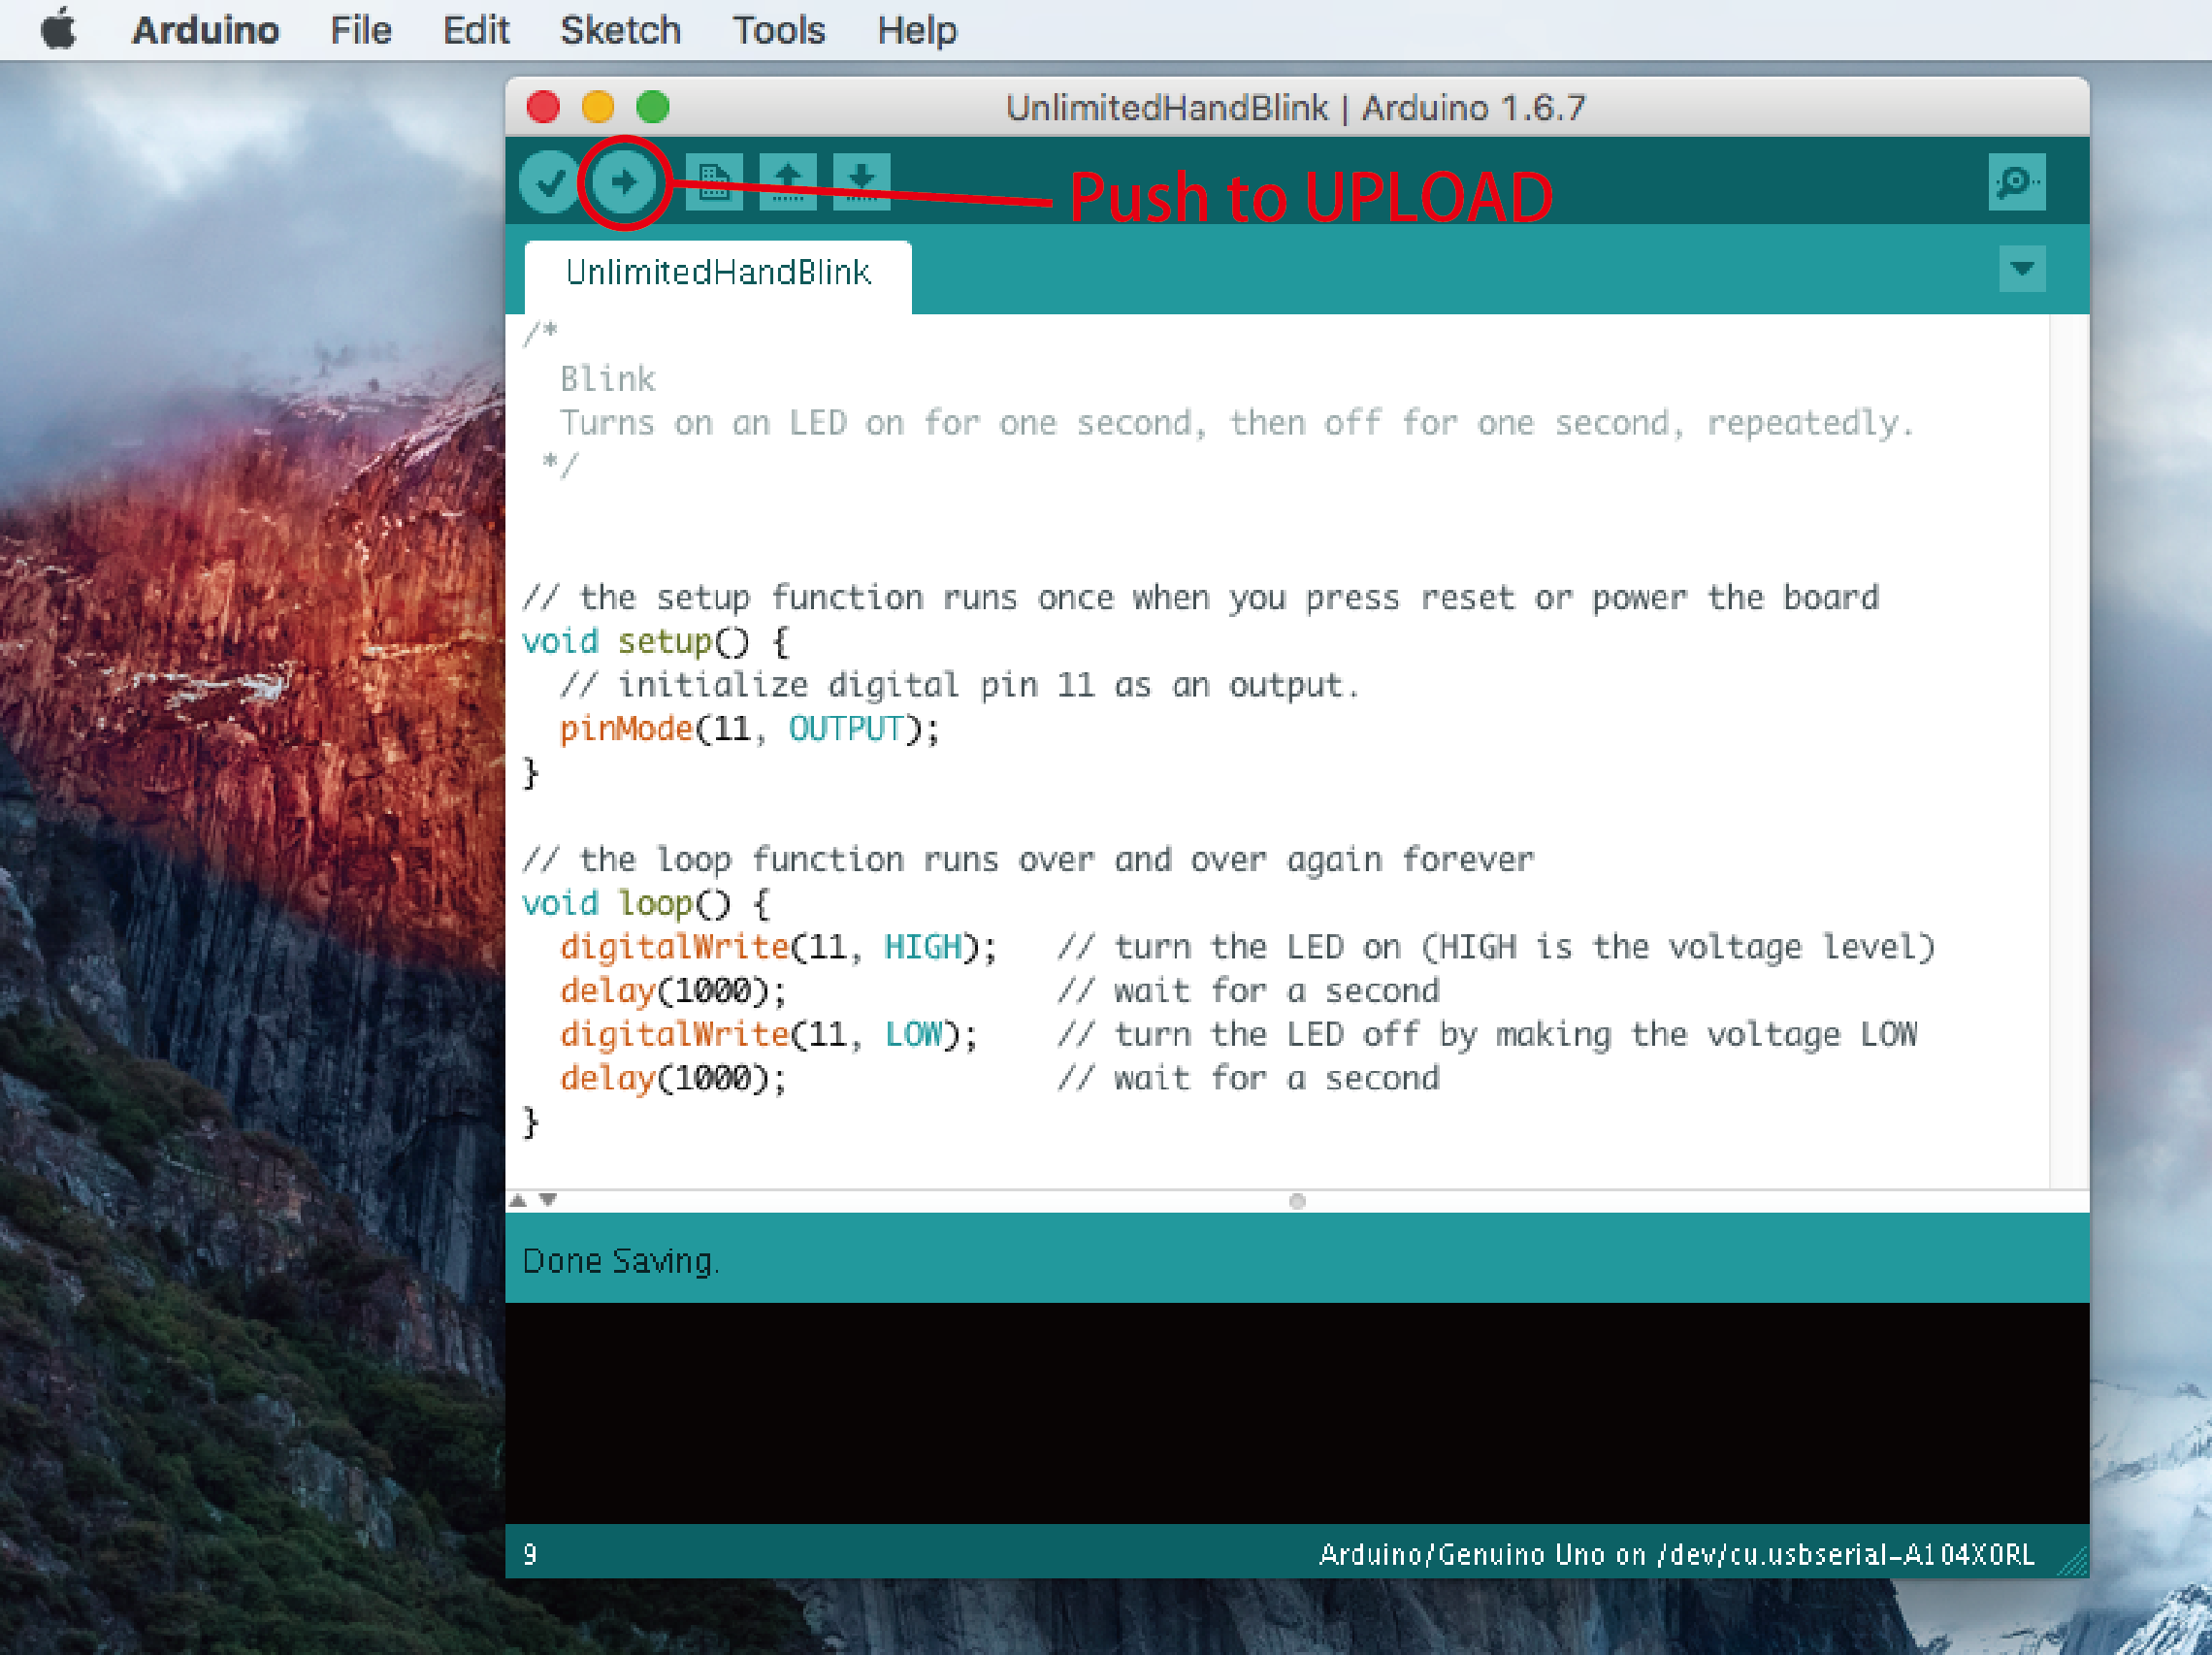
STEP 3. Writing of program
|
/*
Blink
Turns on an LED on for one second, then off for one second, repeatedly.
*/
// the setup function runs once when you press reset or power the board
void setup() {
// initialize digital pin 11 as an output.
pinMode(11, OUTPUT);
}
// the loop function runs over and over again forever
void loop() {
digitalWrite(11, HIGH);
// turn the LED on (HIGH is the voltage level) delay(1000);
// wait for a second digitalWrite(11, LOW);
// turn the LED off by making the voltage LOW delay(1000);
// wait for a second }
|
UnlimitedHand remoteController
Introduction
1. Preparation
2. Schematic
3. Attaching the LED socket
4. Installing the Library
5. Compiling the Program
6. Operation Test
7. Further Reading
Introduction
Prev tutorial runs you through how we can control an LED's blinking pattern.
This time we will show how you can apply it on UnlimitedHand to build a gesture controlled remote control.
How a remote works
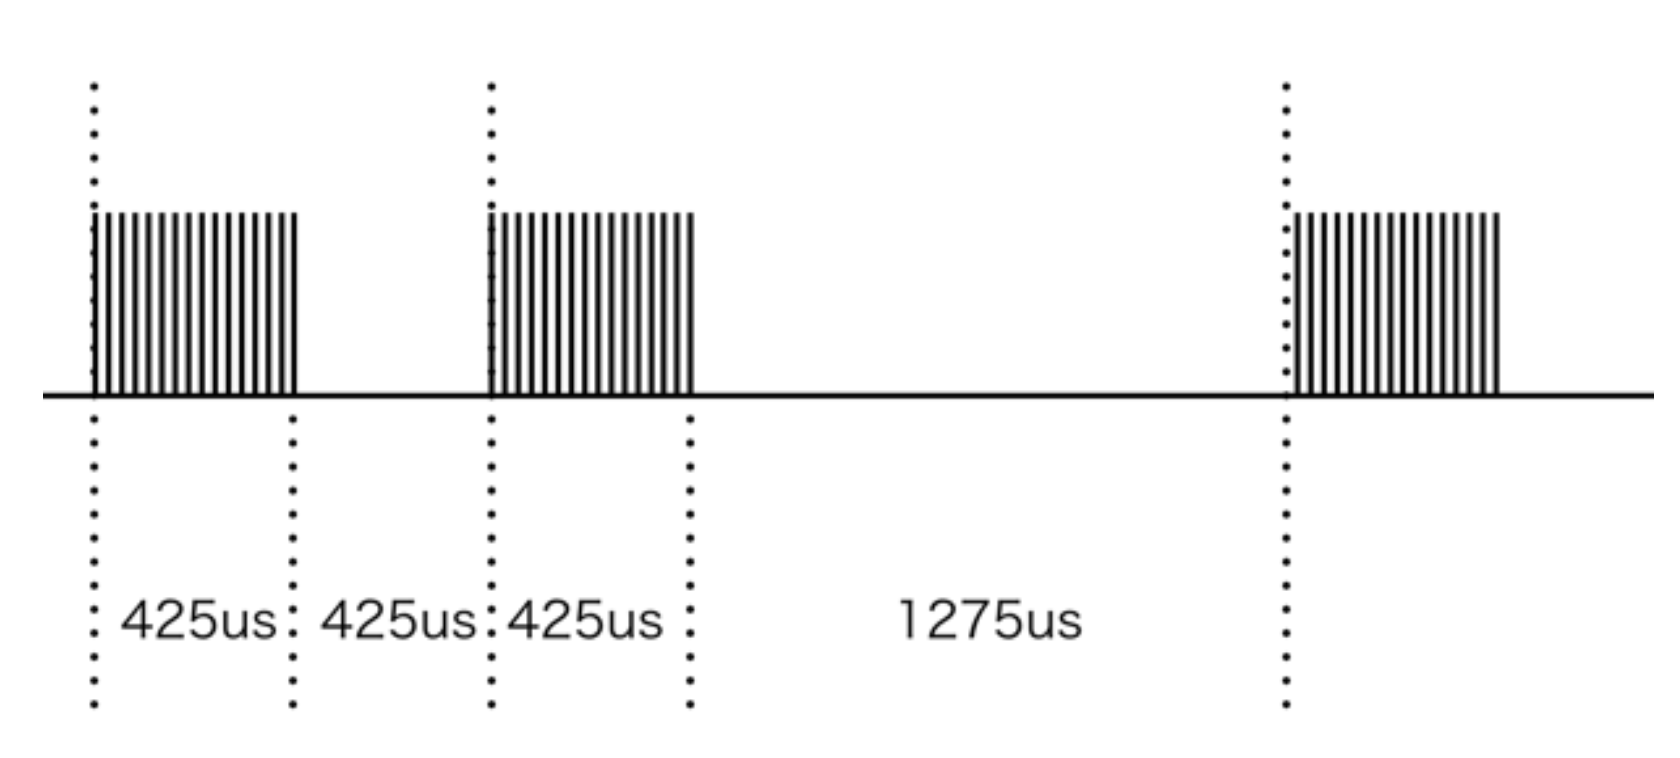
Infrared is not visible to the naked eye, when a button is pressed on a remote an infrared LED on the device flashes in a very high frequency. Home appliances often receive these signals as commands that trigger various functions. Signals received may be used to control a television’s volume, channel and switching it on or off.
How can we use the UnlimitedHand?

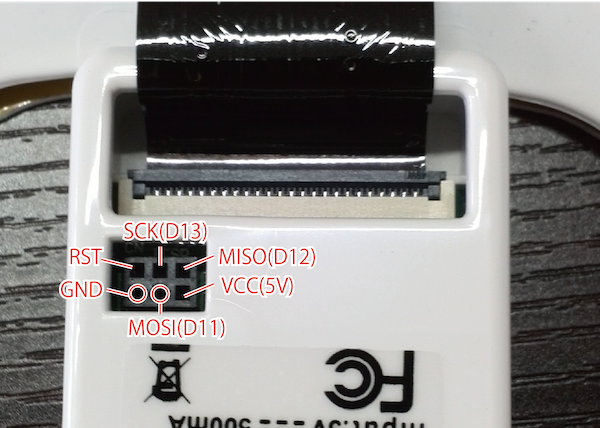
UnlimitedHand is licensed as an AtHeart project by Arduino. This means that it’s micro-computer can be used in the same way as a Arduino board. The pins VCC, GND, TST, D11, D12, D13 can be used. UnlimitedHand’s ICSP port can be used as if programming Arduino’s DIGITAL pins with the functions digitalWrite() and delayMicroseconds(). By doing so we can control the blinking patterns of the infrared LED to create a remote with the Arduino licensed device.
1. Preparation
- - UnlimitedHand and USB cable
- - Infrared LED (TLN110(F))
- - Pin Header (2mm)
- - Shielded copper wires
- - Resistor (47 Ohm)
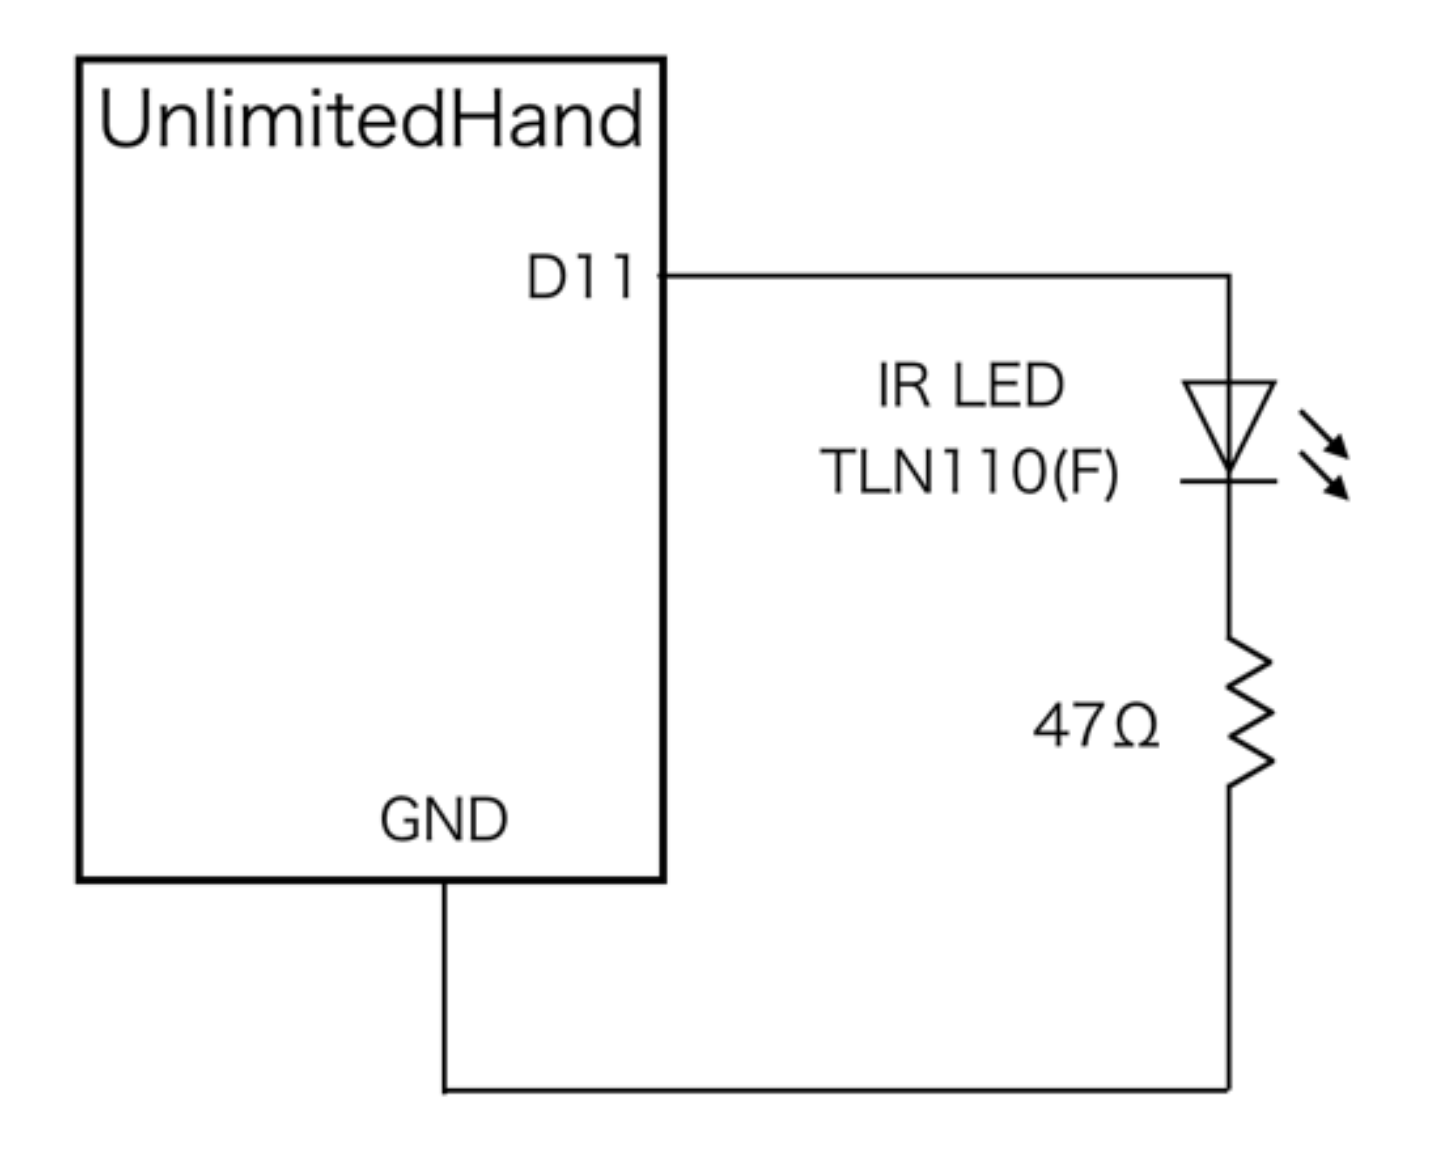
2. Schematic
In this tutorial we will be following the schematic below.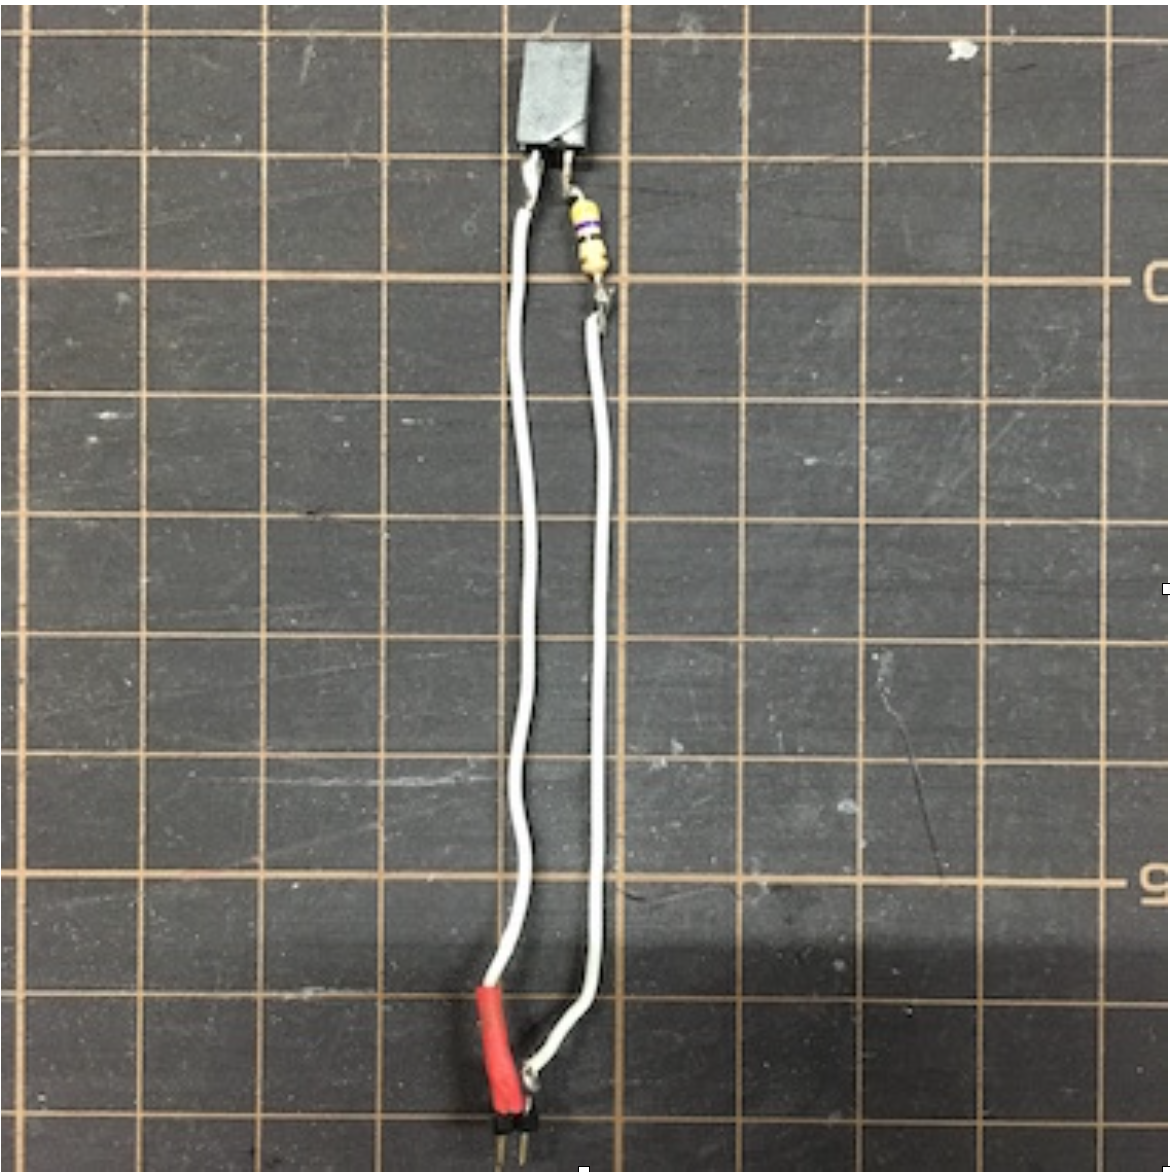
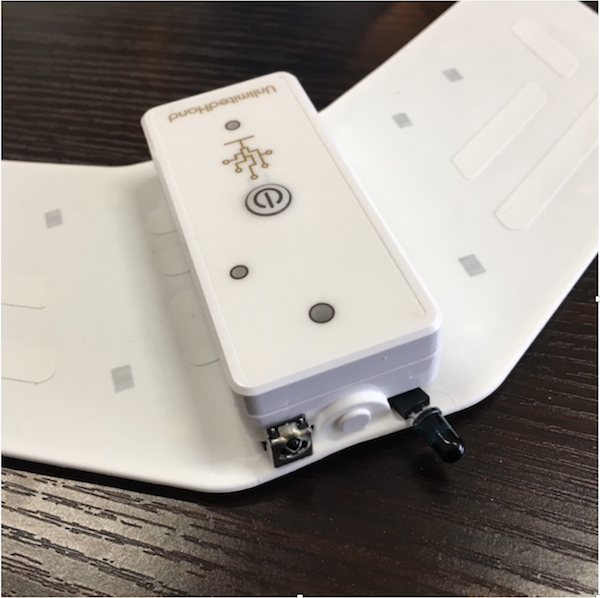
3. Attaching the LED sockets
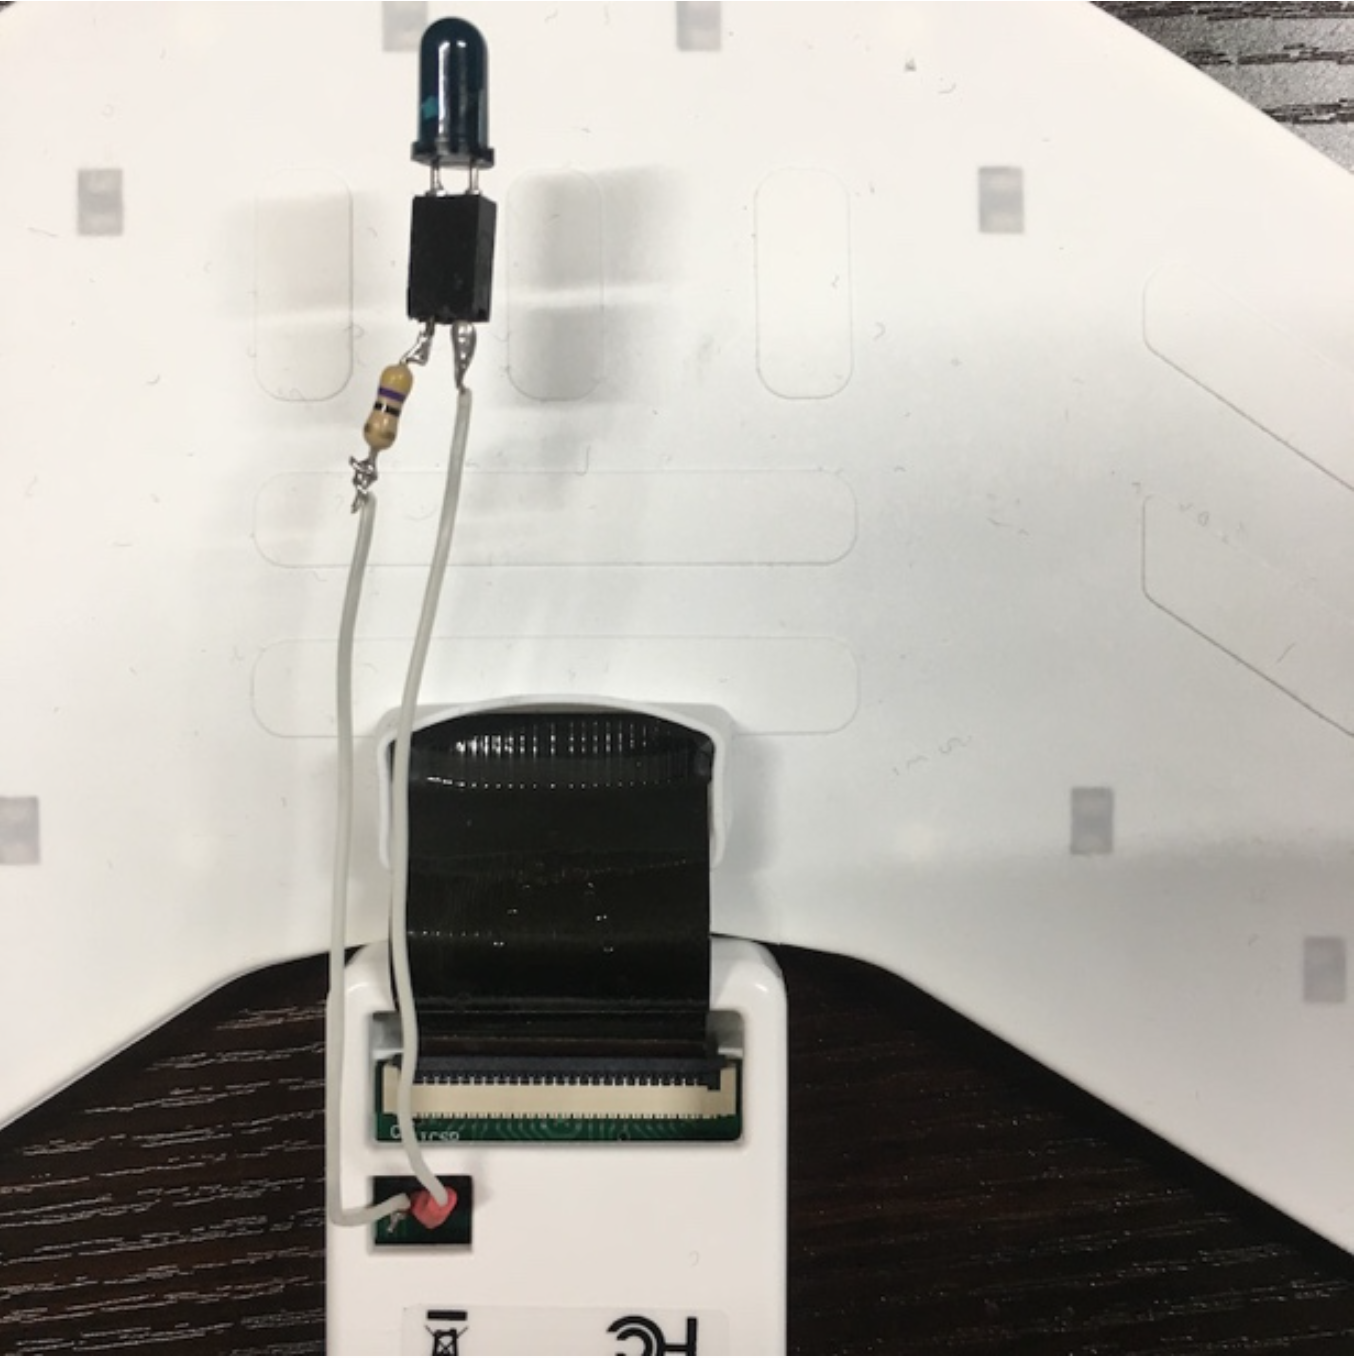
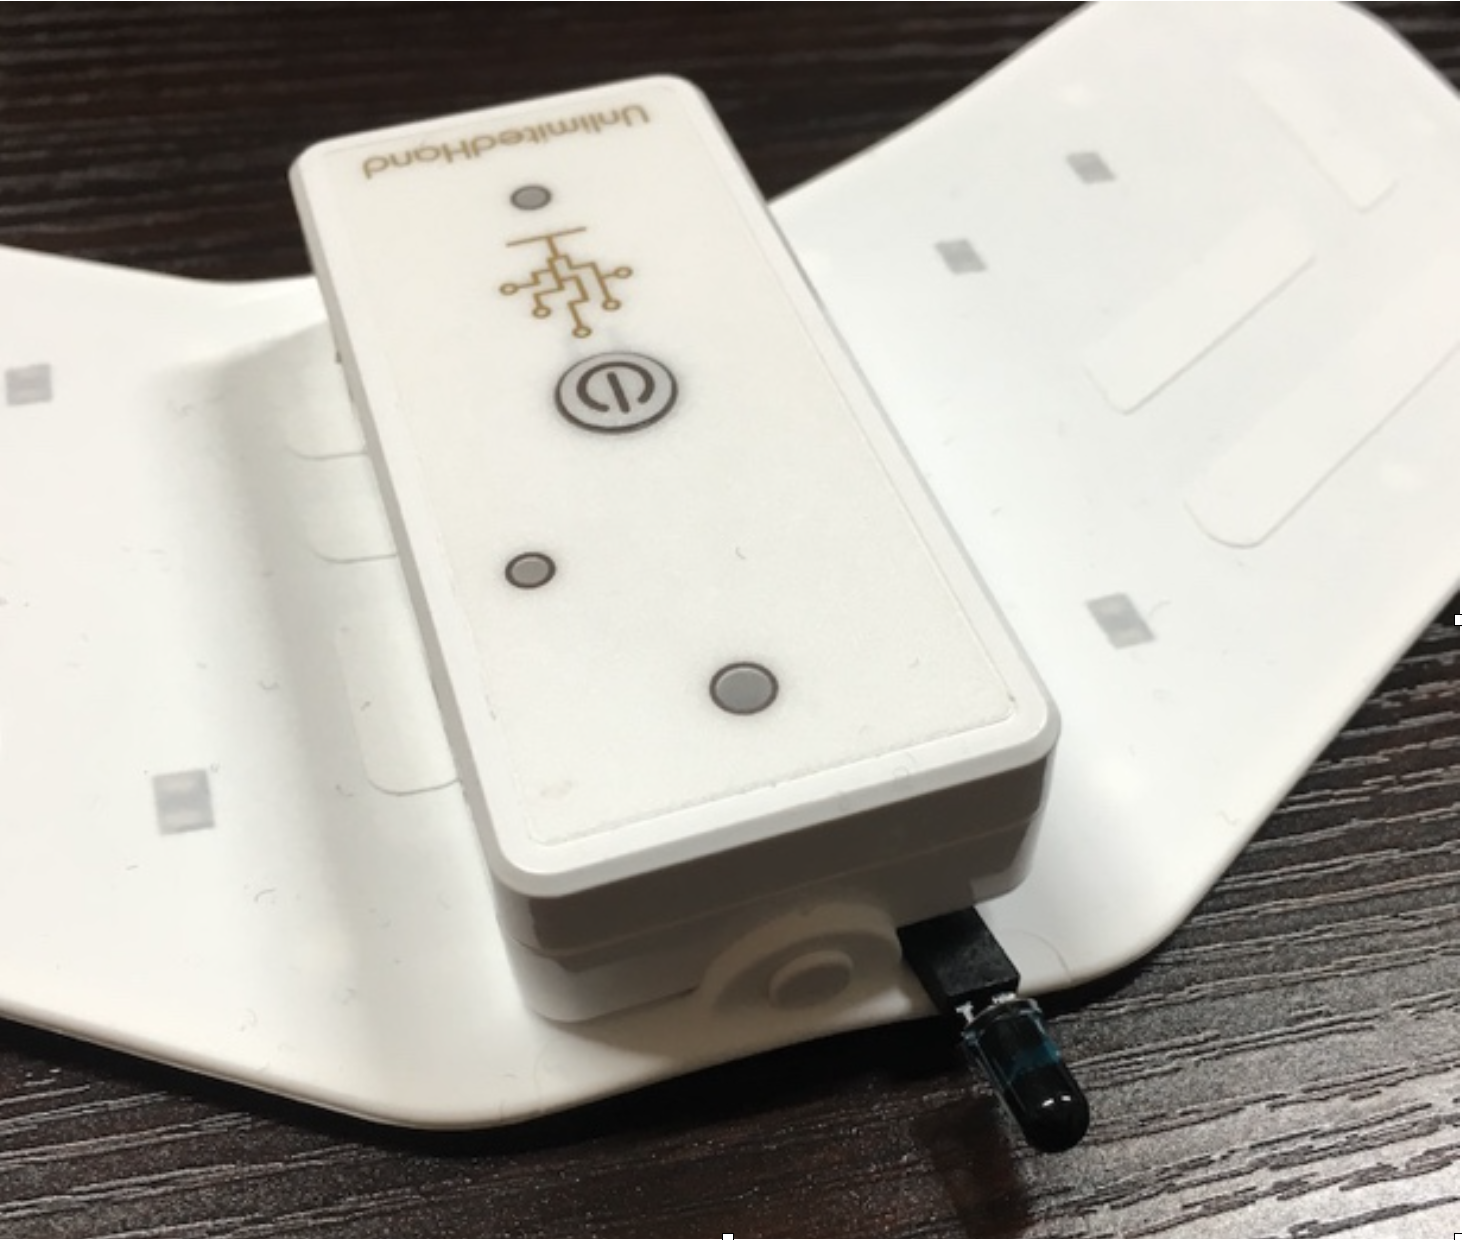
To complete the circuit, we will use a soldering iron to create the LED socket as shown by the image below
Connect the socket to UnlimitedHand’s GND and D11 pins. Plug the LED into the terminal. Beware that the LED is polarized, make sure it is connected in the correct direction.
4. Installing the Library
We will need to update the program within the UnlimitedHand to complete this project.
After log in, download Arduino's UnlimitedHand Library
We will explain how to install and use the library
here.
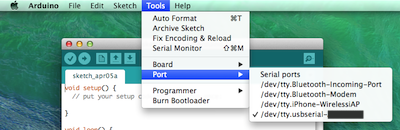
5. Compiling the Program
Connect Unlimited to your computer, use Arduino IDE to compile the program. To select the program, click File > Examples > UH > remoteControl. This program allows you to switch on/off AQUOS televisions made by SHARP.
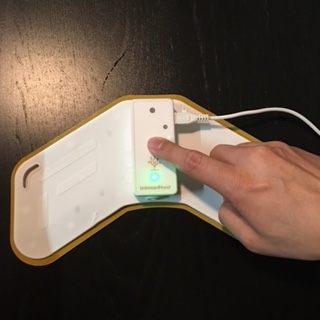
6. Operation Test
Once you are done with compiling the program, please follow the steps below.
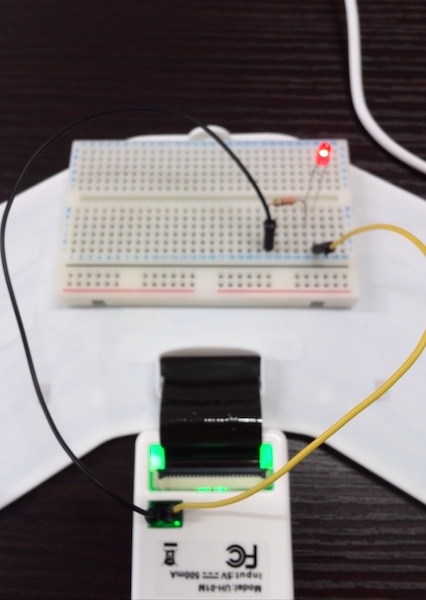
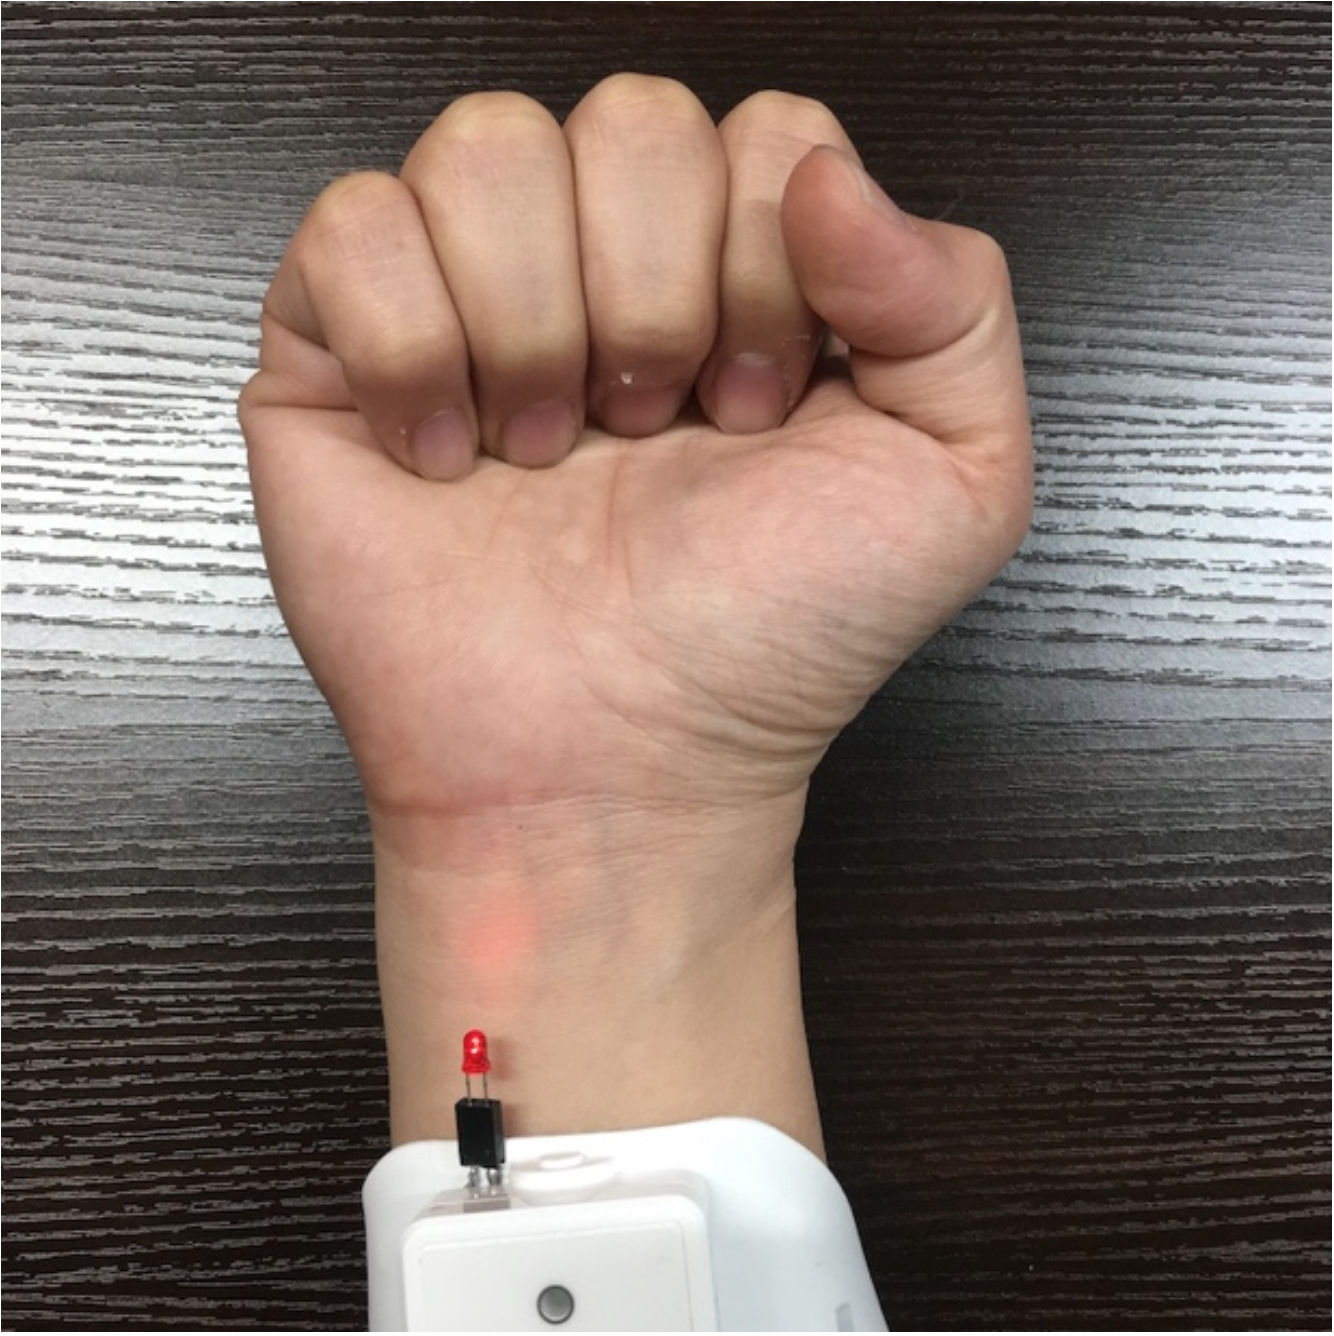
- 1. Since infrared rays are not visible to the eye, use a red LED in place.
- 2. Strap on the UnlimitedHand, make a fist and open up your palm repeatedly to check if the red LED blinks according to the change of your gesture.
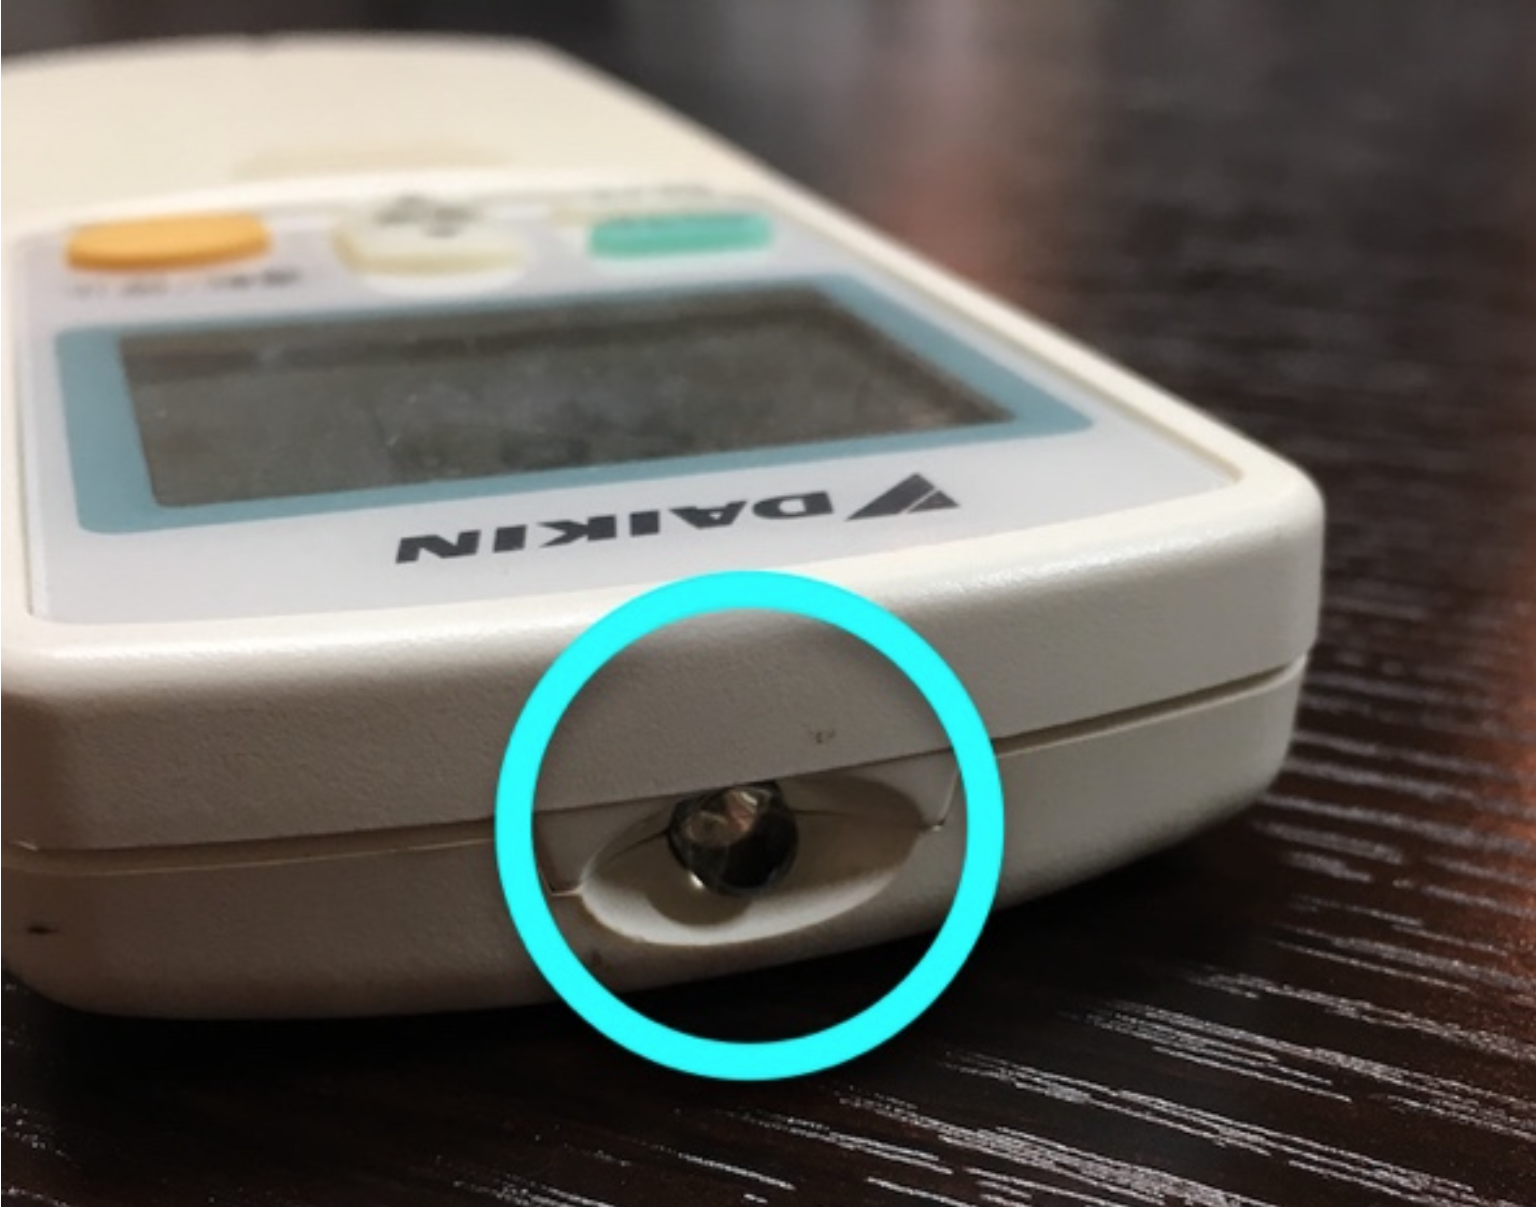
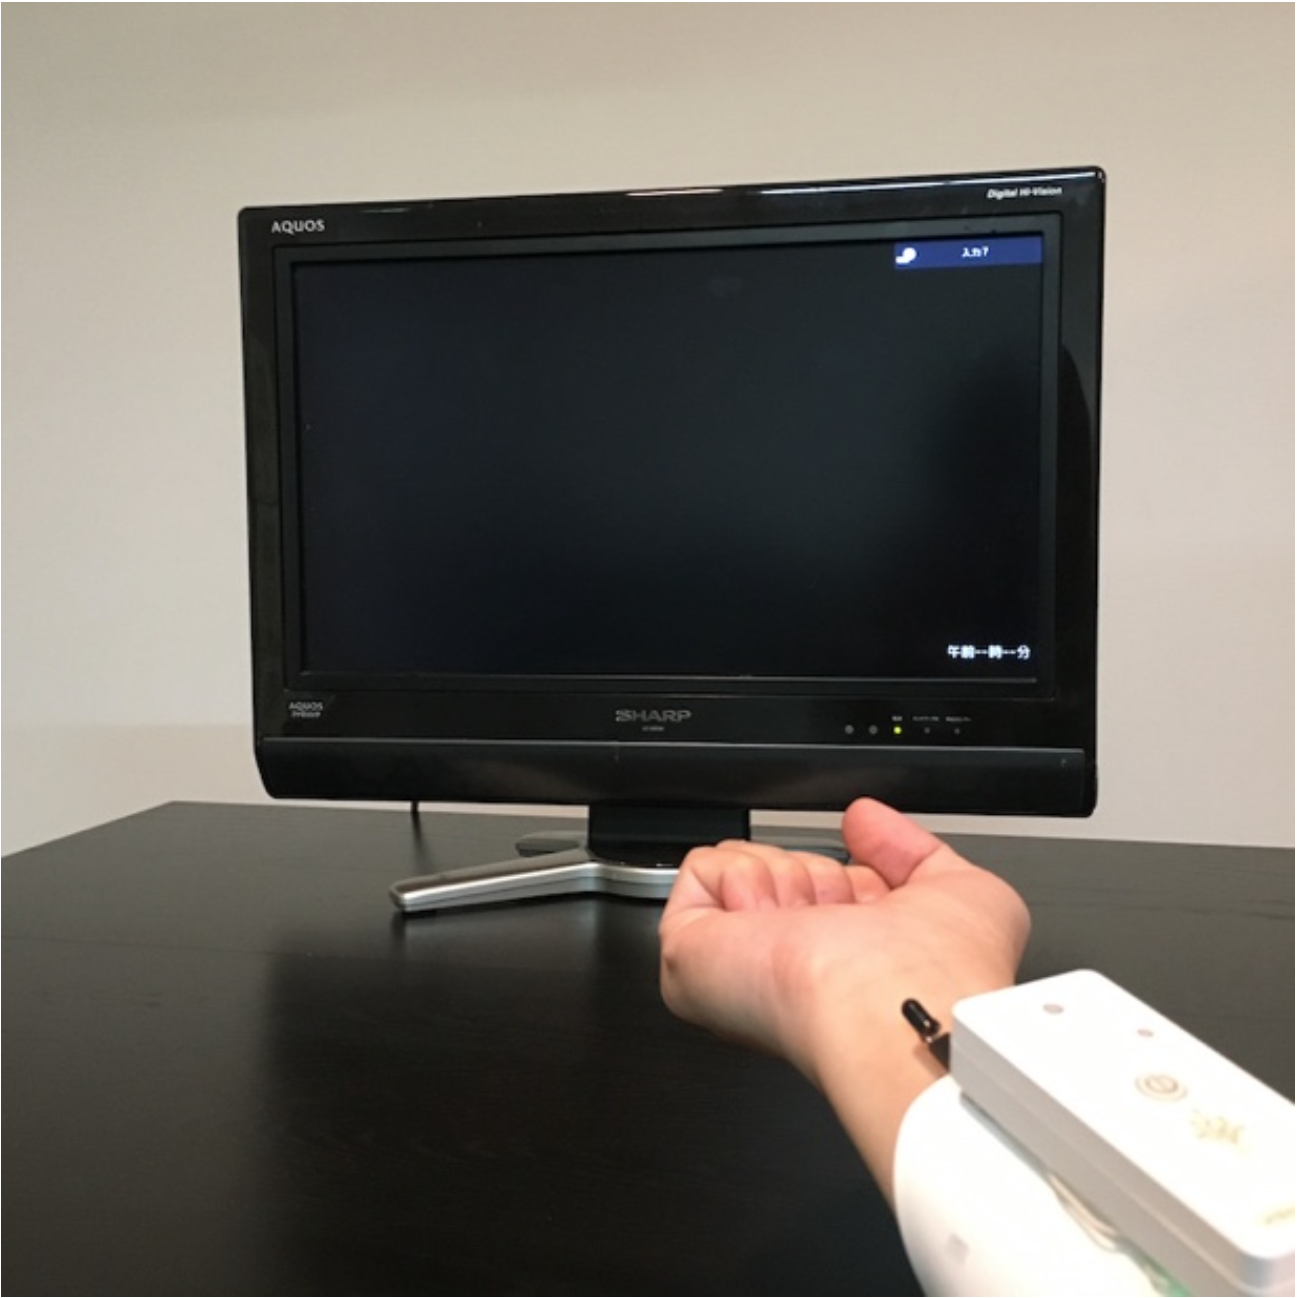
- 3. Replace the the red LED with an infraredLED, point your hand at the television.
- 4. If you hold a fist and see the television turn on, you have succeeded.
7. Further Reading
You could use the program in previous tutorial [blinking LED] to create blinking infrared patterns that are able to control home appliances. Combined with the [remoteReceiver] tutorial, you will be able to create programs that work both ways. With UnlimitedHand’s accelerometer and gyroscope, you can tweak the device to enter receiving mode when your arms are let down, and enter transmission mode when your arms are raised. Various gestural applications can be realized if you are willing to take up the challenge.
UnlimitedHand Remote Receiver
Introduction
1. Preparation
2. Schematic
3. Building the Circuit
4. Install the library
5. Compiling the Program
6. Operation Tests
7. Further Reading
Introduction
Prev guides you through making a remote for controlling a television with gestures.
This tutorial will teach you how to control the television with gestures using UnlimitedHand’s ICSP port.
This time we will use sensors to collect data from our environment.
We will demonstrate how the device is capable of reading IR signals transmitted by a remote controller.
Creating a gesture remote with the UnlimitedHand
Various sensors used to create a gesture-based remote with UnlimitedHand
Sensors are a general term for components that take in information from our environment. Temperature sensors, light sensors, humidity sensors, acceleration sensors, are some of the various sensors that we can put to use. In this tutorial, we will be using infrared sensors typically embedded in television sets and air-conditioners to receive signals from remotes. We will be able to sense blinking patterns emitted by infrared devices, which are not visible to the naked eye.
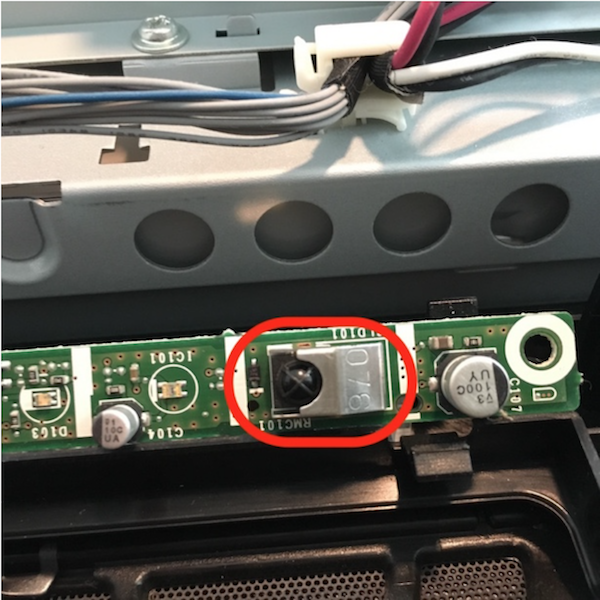
Infrared receiving module used in home appliances
Infrared receiver module
infrared sensors are available for sale as various modules. You can look for them in stores that sell electronic components.
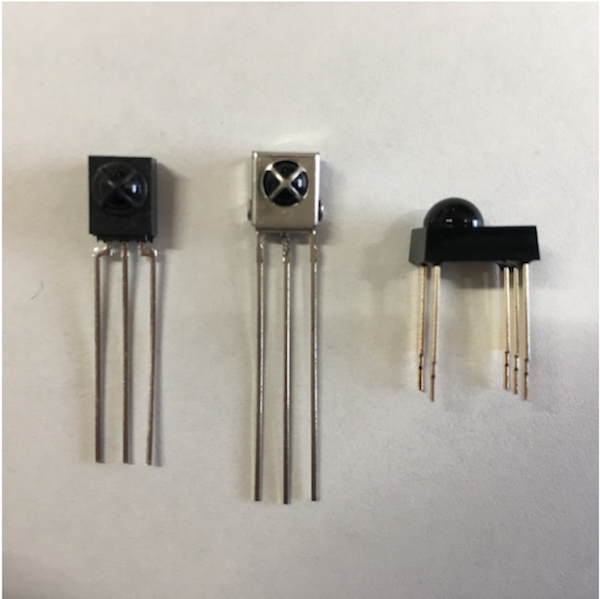
Various types of infrared signal receivers
Realizing it on the UnlimitedHand
UUnlimitedHand is licensed as an AtHeart project by Arduino. This means that it’s micro-computer can be used in the same way as a Arduino board. The pins VCC, GND, TST, D11, D12, D13 can be used.
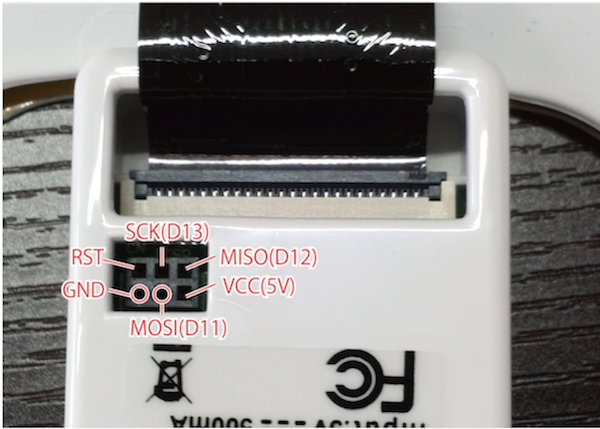
UnlimitedHand’s ICSP port can be used as if programming Arduino’s DIGITAL pins with the functions digitalWrite() and delayMicroseconds(). By doing so, one will be able to control the blinking pattern of an infrared LED or receive remote signals with UnlimitedHand.
1. Preparation
- - UnlimitedHand and a USB cable
- - Infrared Signal Receiver Module (PL-IRM1261-C438)
- - Pin Header (2mm)
- - Breadboard
- - Jumper Cables
2. Schematic
The circuit diagram for this project is listed below. Since it is made as a module, the three pins VCC, GND and D12 can be used as is. ( In order to prevent noise from influencing the circuit, please refer to the data sheet and apply an RC circuit.)い)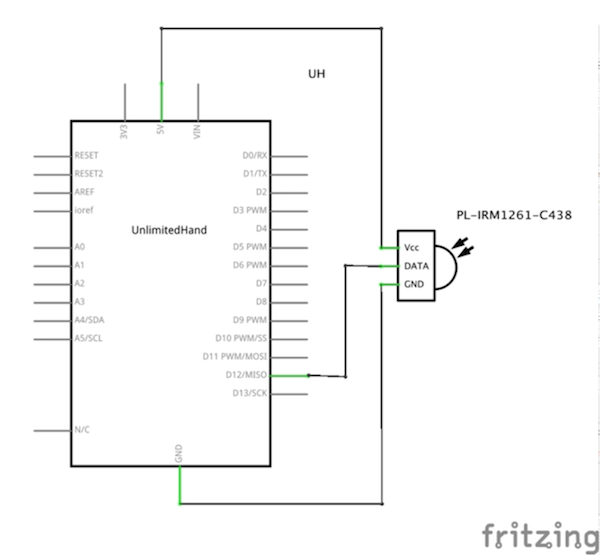
3. Building the Circuit
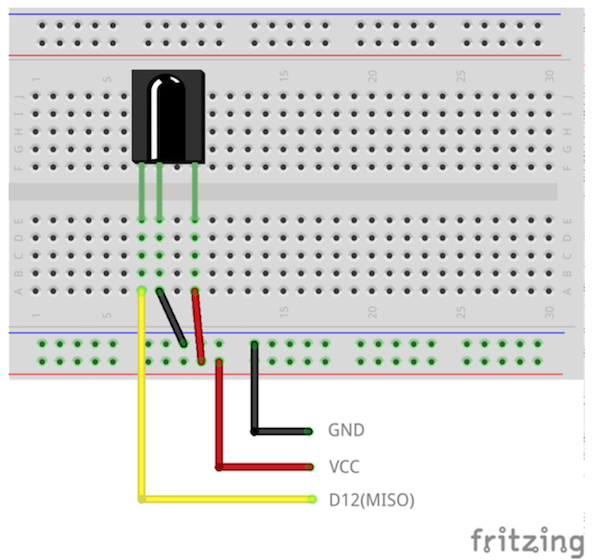
Let us use breadboard and jumper cables to put together the circuit shown below.
4. Installing the Library
We will need to update the program within the UnlimitedHand to complete this project. After log in, download the Arduino Library
We will explain how to install and use the library here
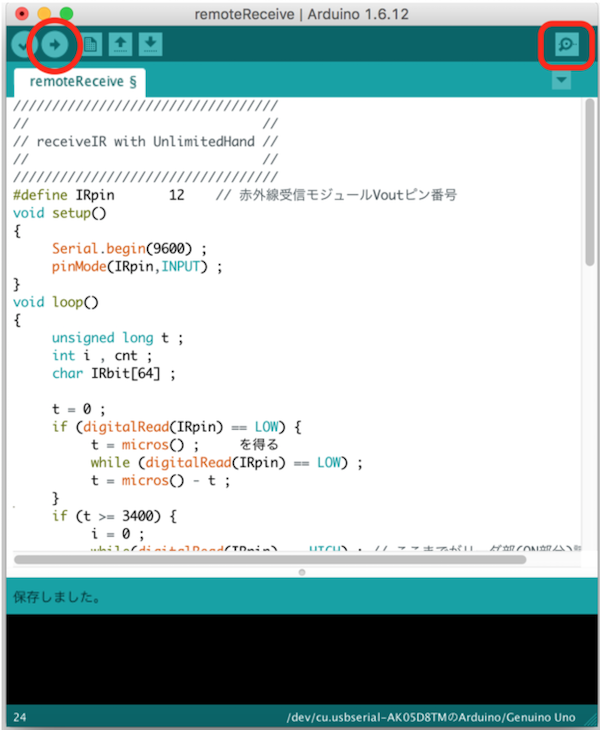
5. Compiling the Program
Connect UnlimitedHand with the computer, use Arduino IDE to compile the program. To locate the example click on File > Examples > UH > remoteReceive. This program prints out onto the serial monitor infrared blinking patterns received by the device.
6. Operation Test
Once the program has finished compiling, you can take the following steps to make sure it is working.
- 1. Start up the serial monitor
- 2. Prepare the pattern that you wish to read with the remote. Point at the receiver and press the button. Press and hold on to the button until the pattern is recognized.
- 3. If you see characters outputted on the serial monitor, the transmission is complete.
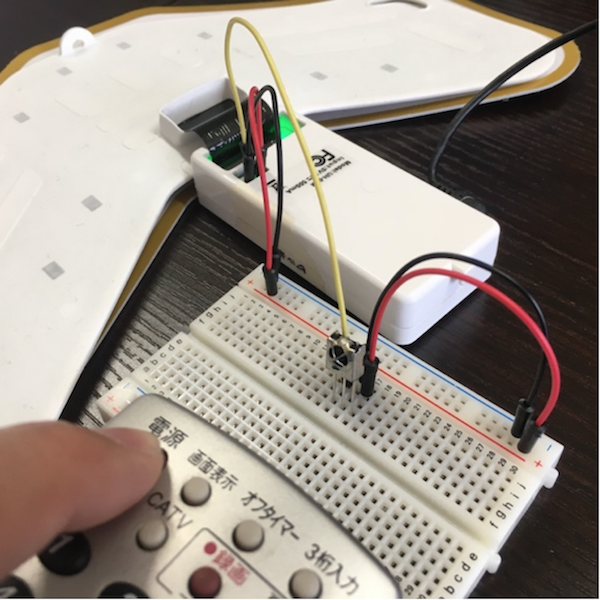
Observing the received pattern by the remote
7. Further Reading
You could use the program in previous tutorial [blinkingLED] to create blinking infrared patterns that are able to control home appliances. Combined with the [remoteController] tutorial, you will be able to create programs that work both ways. With UnlimitedHand’s accelerometer and gyroscope, you can tweak the device to enter receiving mode when your arms are let down, and enter transmission mode when your arms are raised. Various gestural applications can be realized if you are willing to take up the challenge.