
UHUpdaterによるサンプルプログラムの更新方法
STEP0:パソコンがインターネットに接続されているかを確認
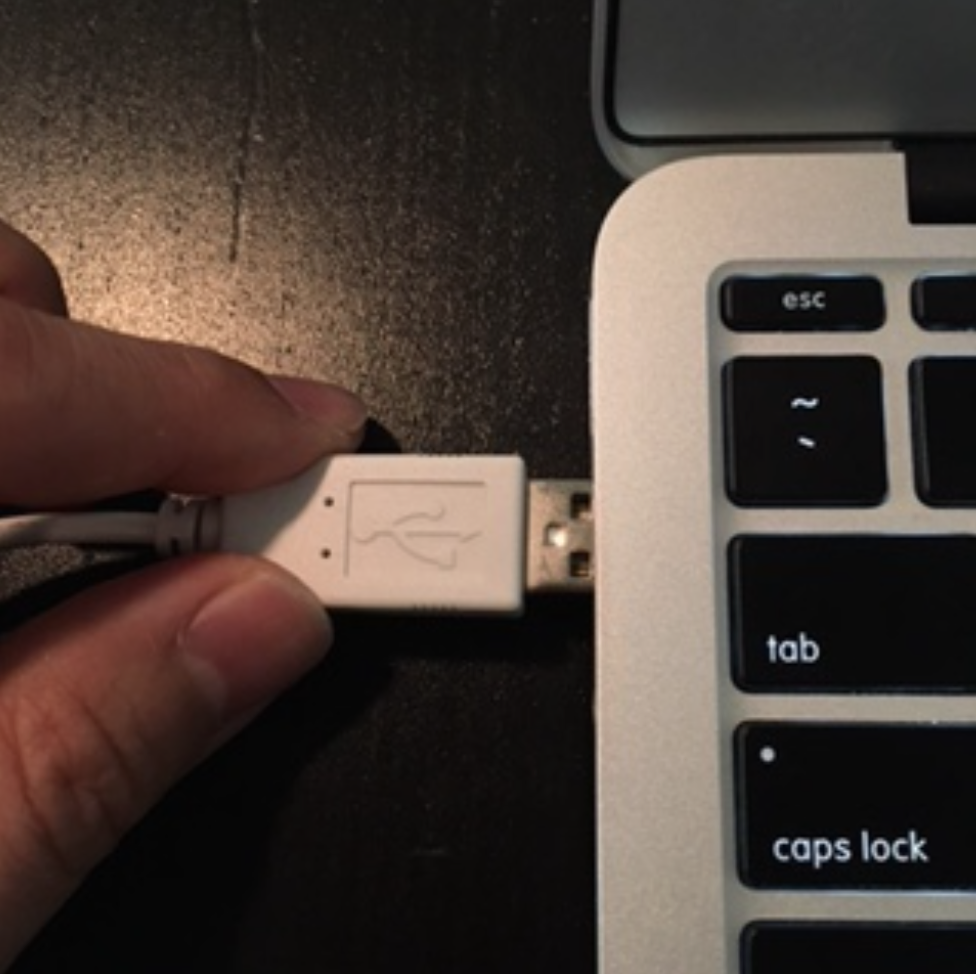
STEP1:UnlimitedHandをUSBケーブルでパソコンに接続
UnlimitedHandoをUSBケーブルでパソコンに接続し、UnlimitedHandの電源を入れて下さい。

STEP2:UHUpdaterのダウンロードと起動
最新版のUHUpdaterはここからダウンロード
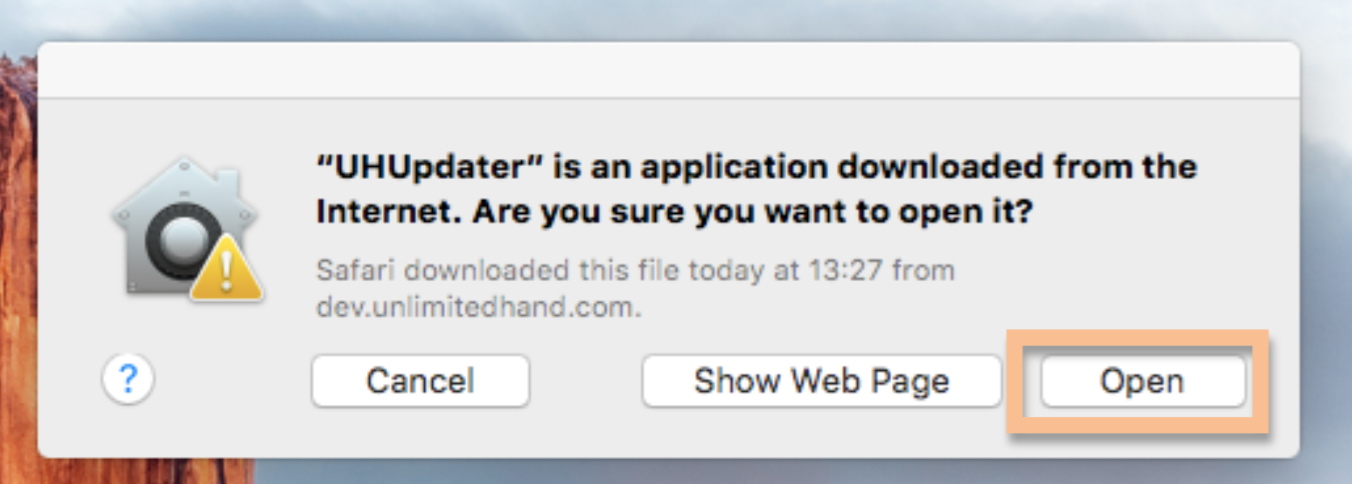
ダウンロードしたパッケージを実行。
警告画面が出た場合は、Open をクリックし、続行して下さい。
UHUpdaterのインターフェースが起動します。Updaterの現在のバージョンは、タイトルバーに表示されています。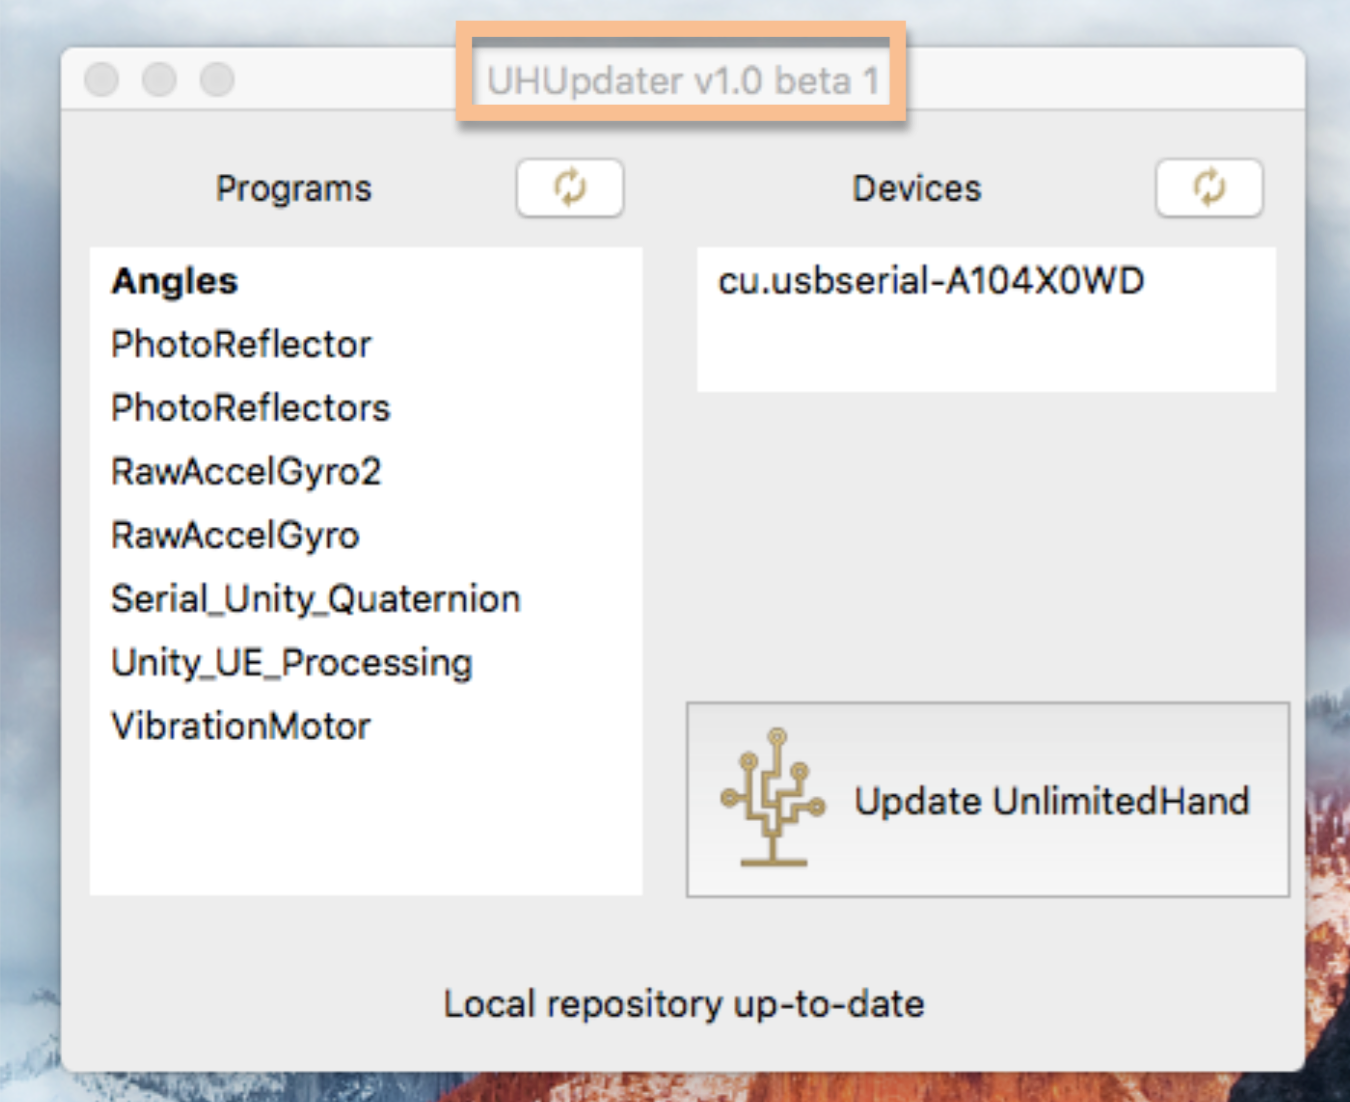
ダウンロードしたパッケージを実行。
警告画面が出た場合は、Open をクリックし、続行して下さい。
UHUpdaterのインターフェースが起動します。Updaterの現在のバージョンは、タイトルバーに表示されています。
STEP3:UHUpdaterを使ってUnlimited Handを更新
プラグラムは起動した際、自動的に、更新されたプログラムを確認し、繋がれているUnlimitedHandを認識します。
更新したいプログラムを左のProgramsリストから選んで、クリックで選択。今回は、“Serial_Unity_Quaternion”を使用します。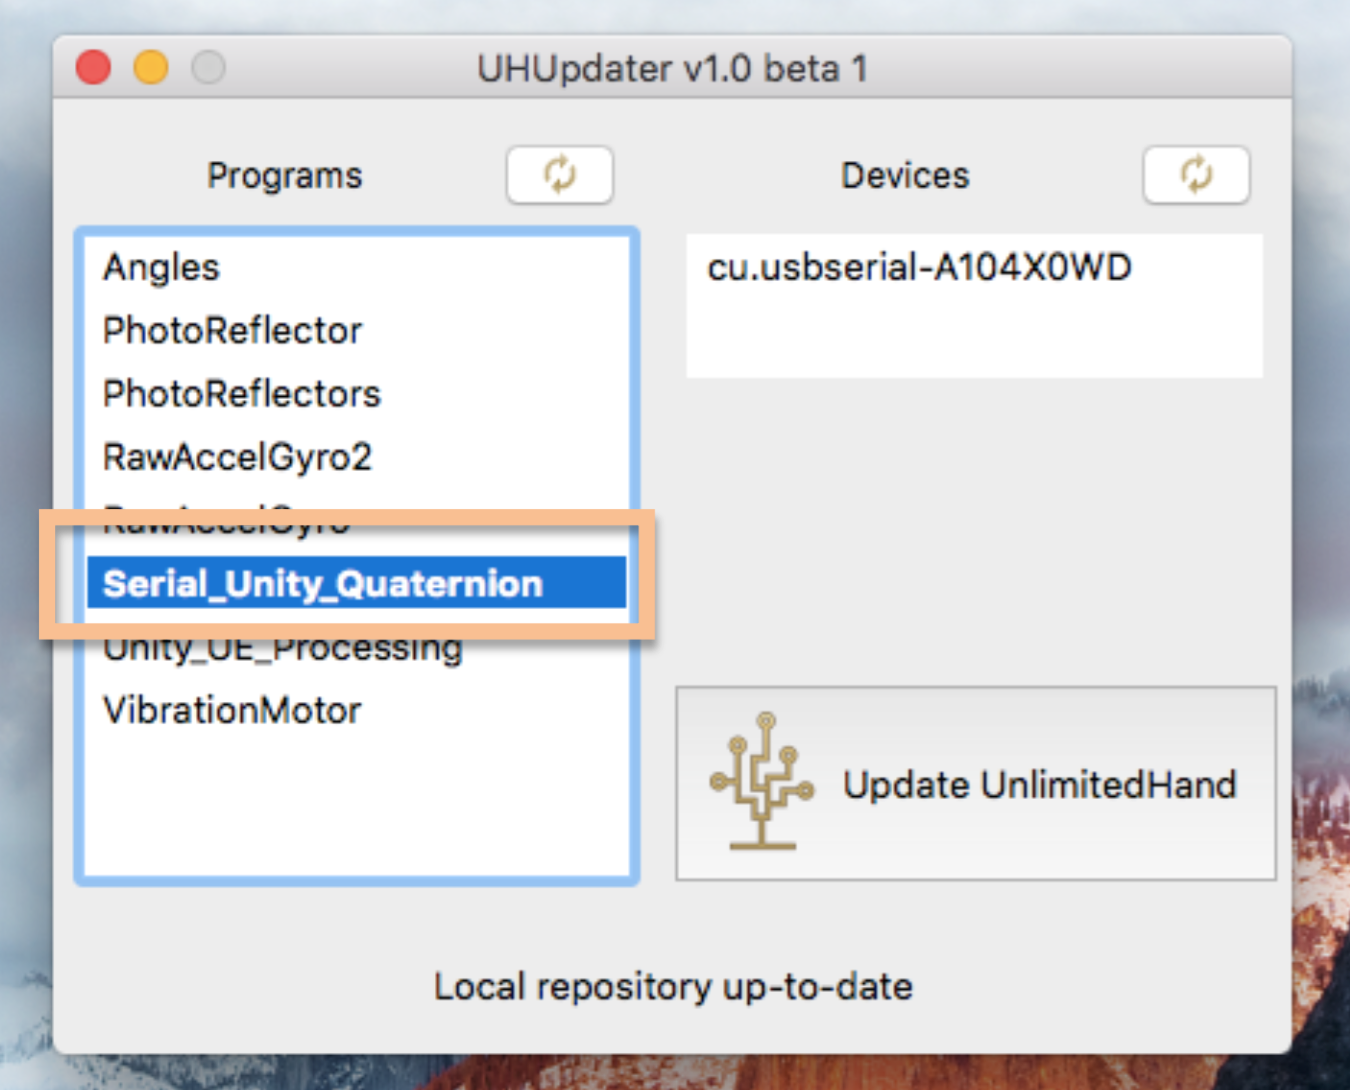
使用したいUnlimitedHandが表示されない場合、UnlimitedHandがUSBポートに繋がれていて、
電源が入っていることを確認し、Devicesの横の再読み込みボタンをクリックして下さい。
複数のUnlimitedHandを接続した場合、接続された全てのUnlimitedHandがDevicesリストに表示されます。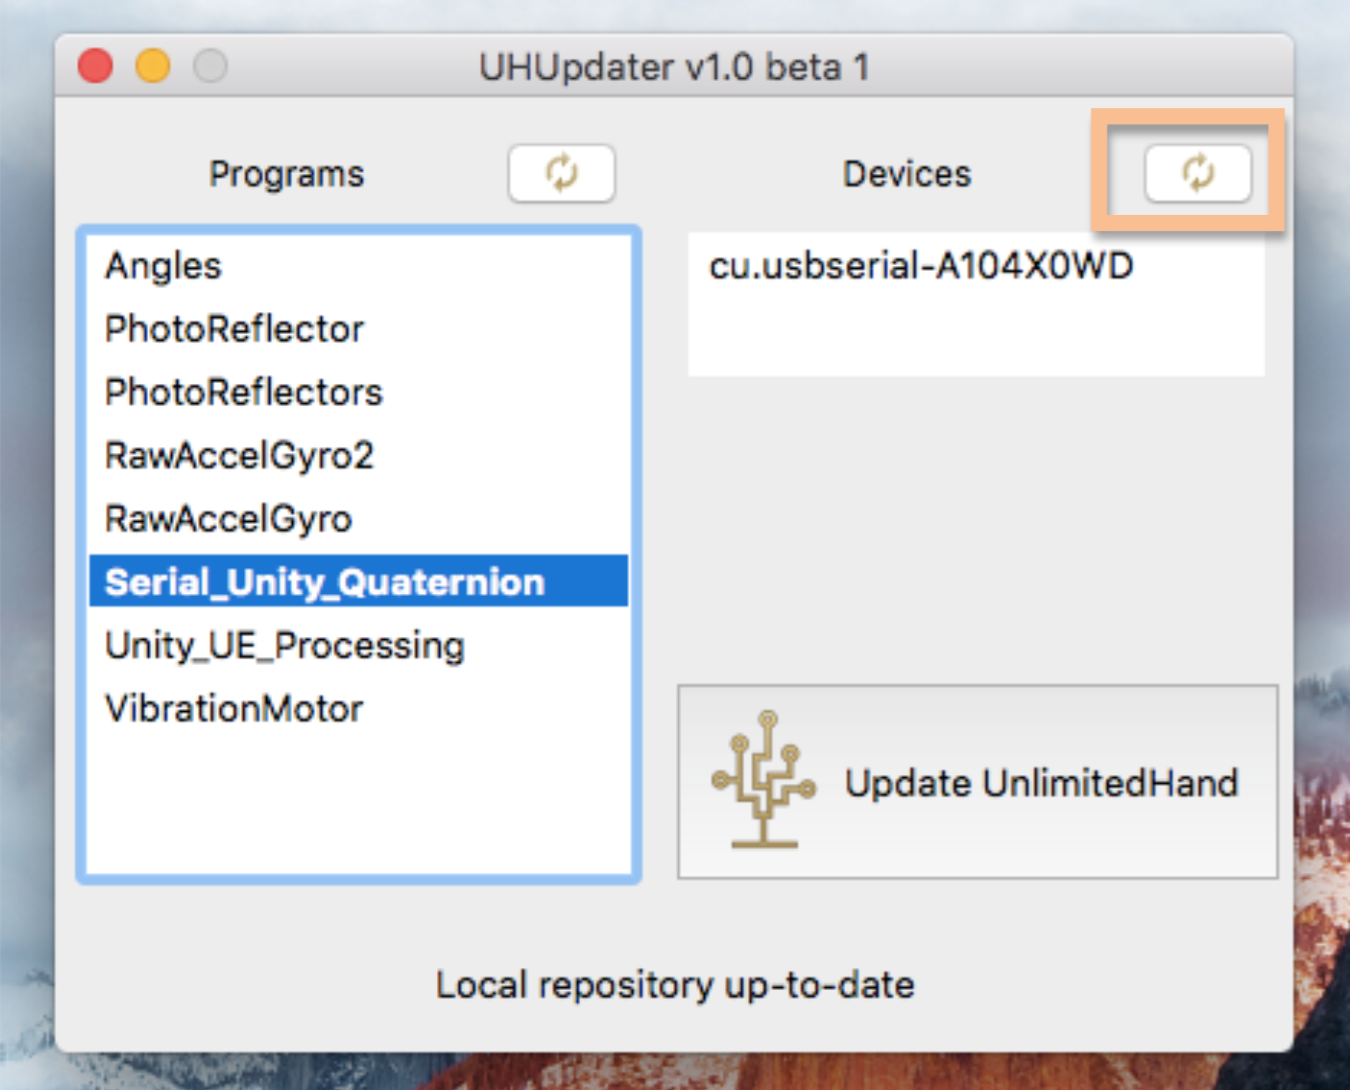
更新したいUnlimitedHandを右のDevicesリストから選び、クリックで選択。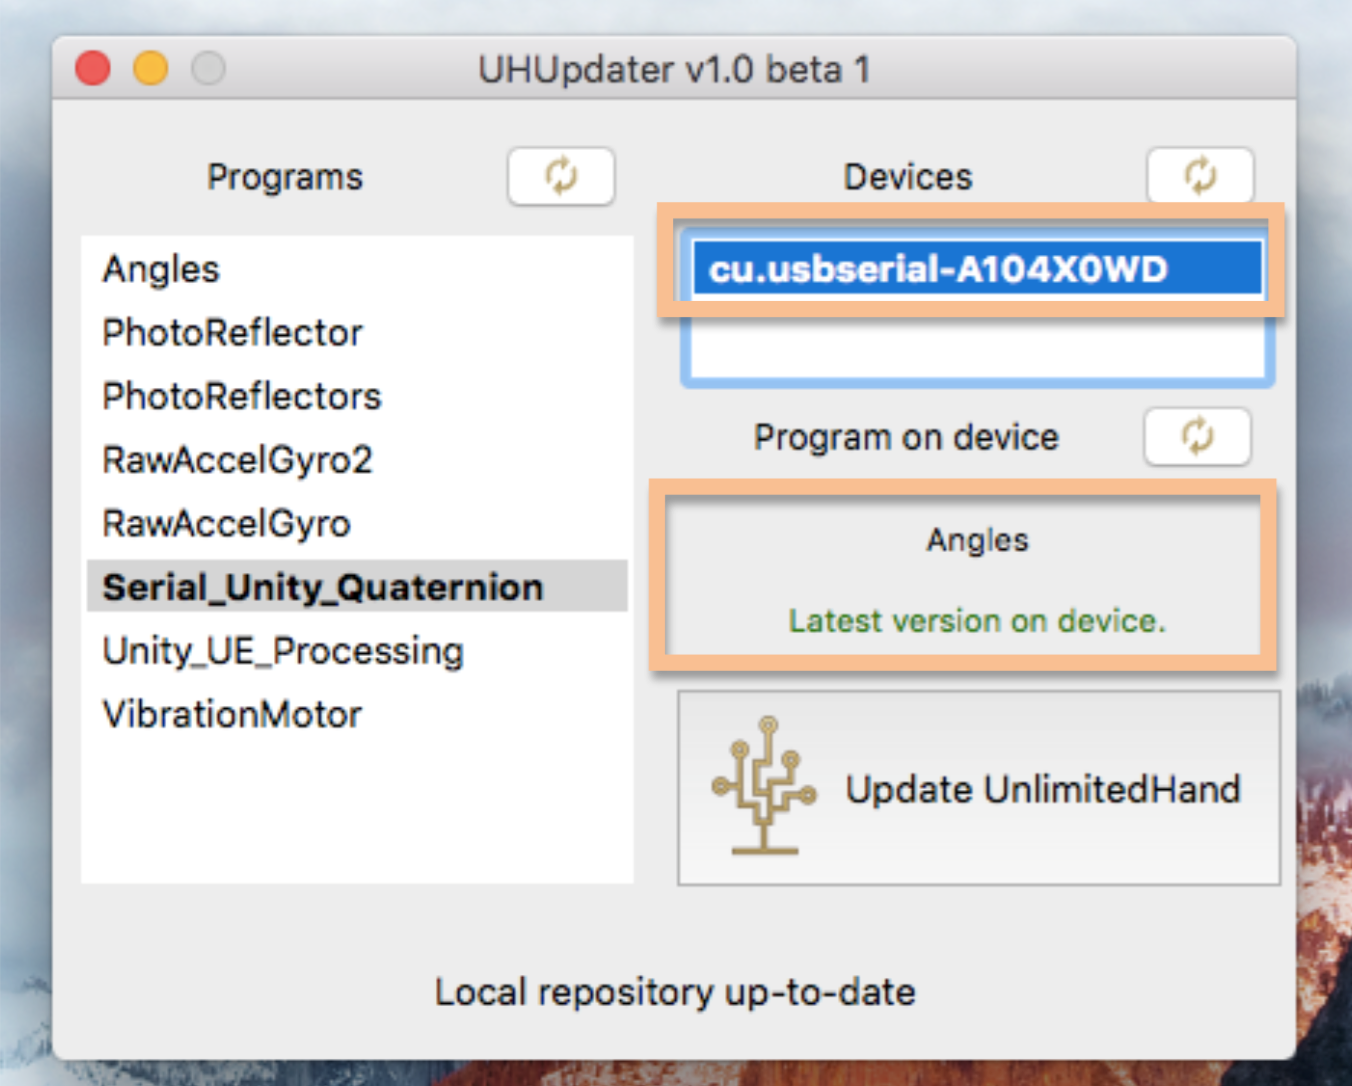
UHUpdaterはUnlimitedHandに現在書き込まれているプログラムの名前とバージョンを確認し表示します。
今回は、“cu.usbserial-A104X0WD”に、Anglesのプログラムが書き込まれていることがわかります。
デバイスとプログラムを確認したら、“Update UnlimitedHand”をクリックして下さい。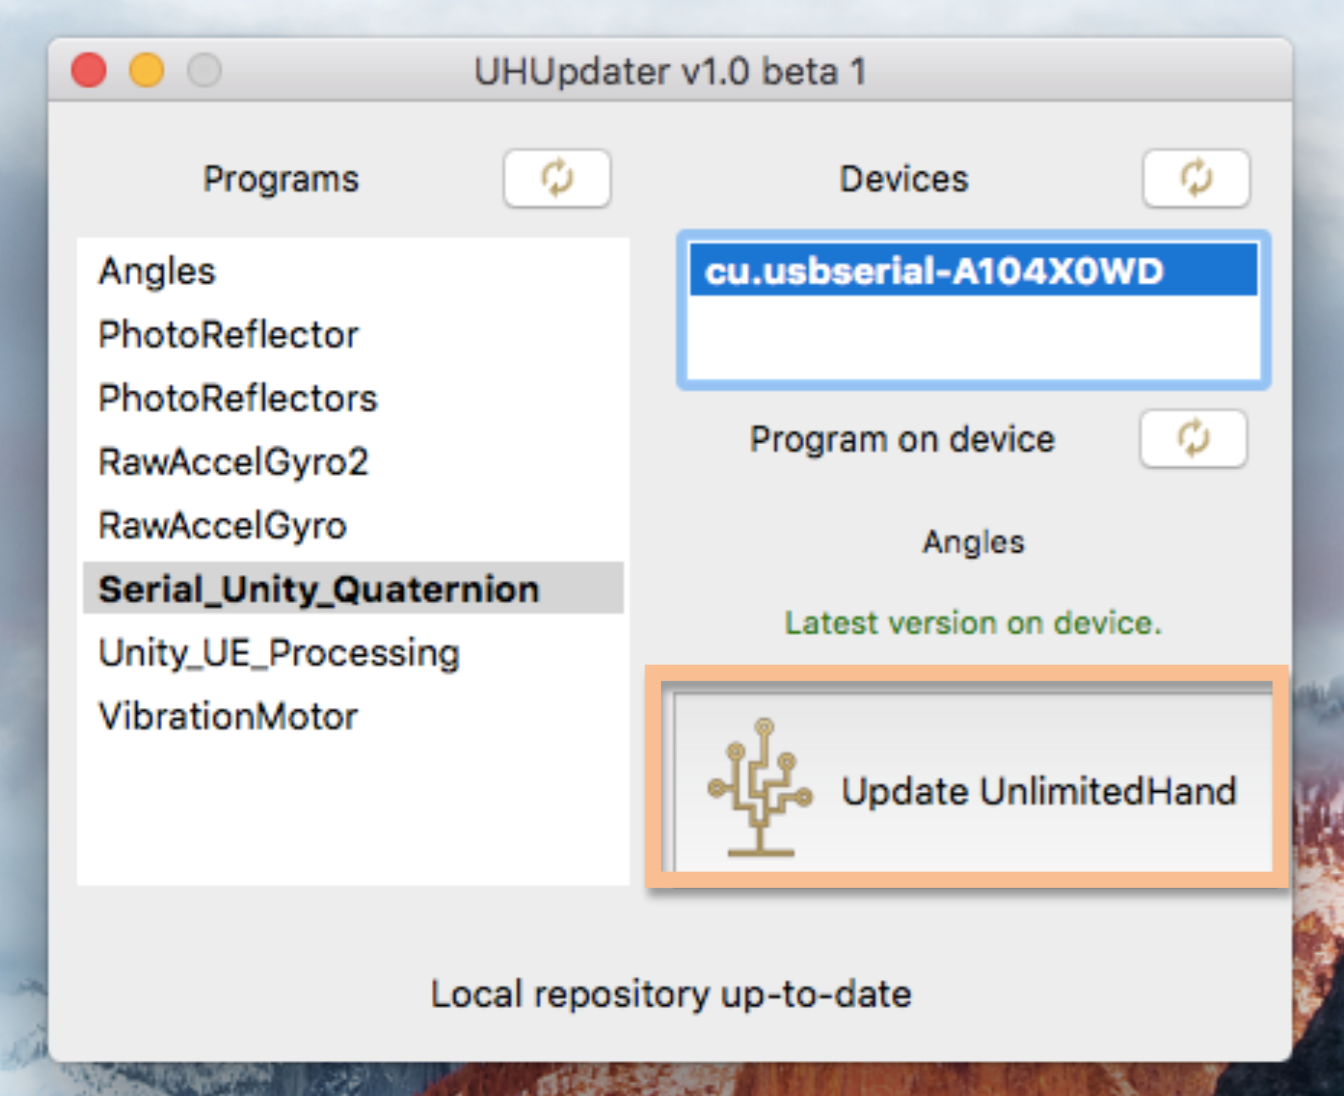
NOT REMOVE OR TURN OFF THE DEVICE.という警告画面が表示されます。 更新には約30秒かかります。
中断する場合は、“Cancel”をクリックして下さい。
“OK”を押すと更新を開始します。更新中、UnlmitedHandが振動します。
更新が終わると、新しいプログラムとそのバージョンが表示されます。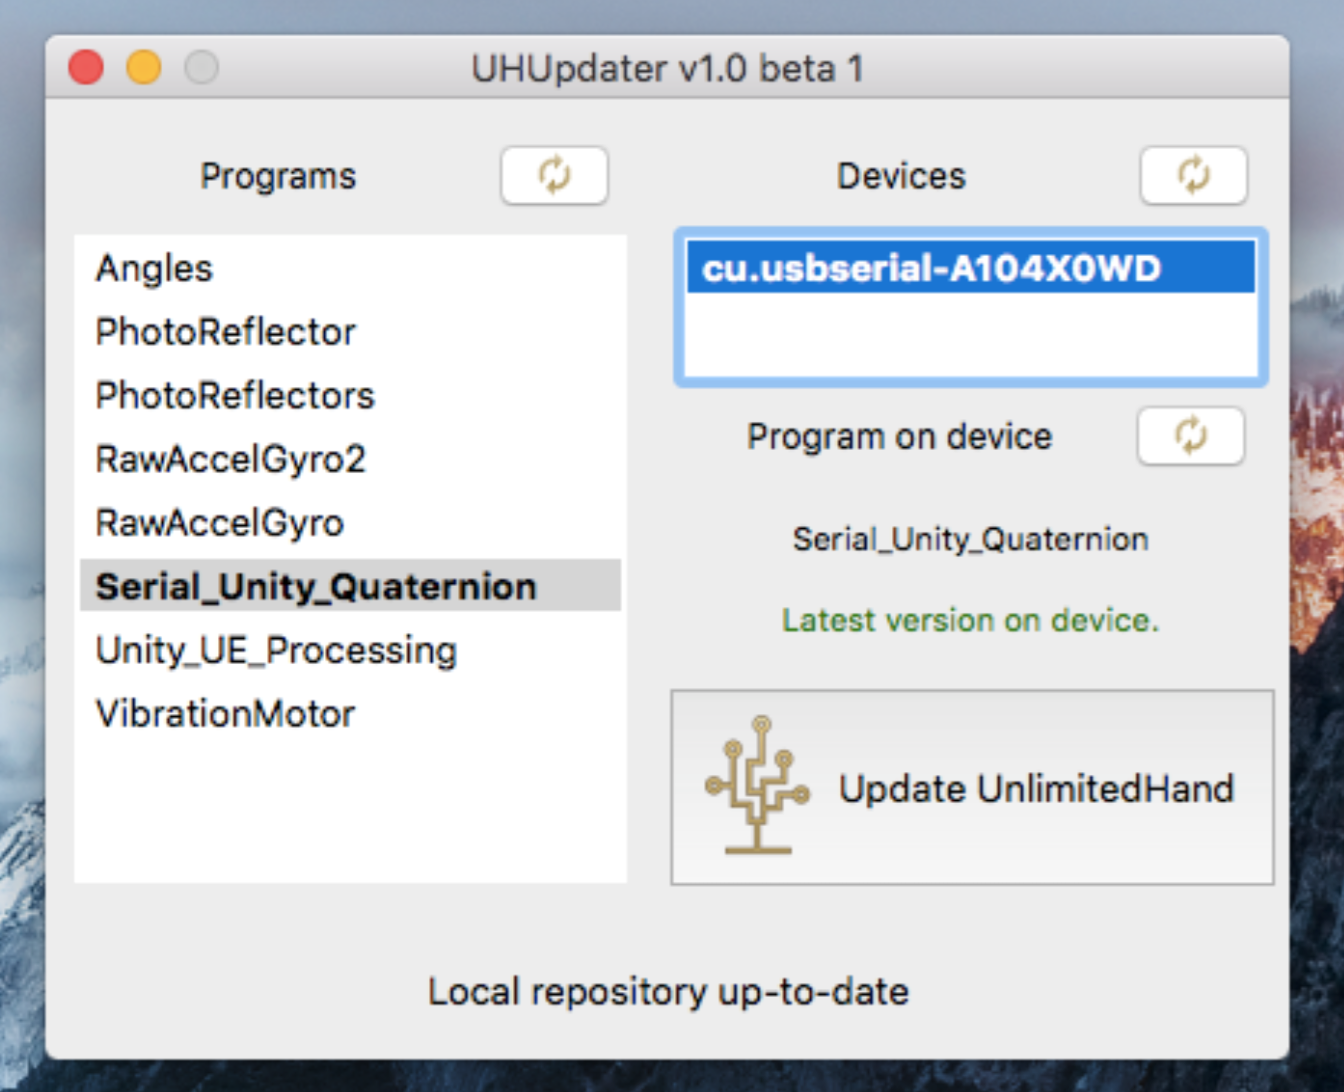
エラーメッセージが表示されなければ、更新は成功です。
STEP4: シリアルモニタでUnlimitedHandの接続を確認
次に、今までの手順で、“Serial_Unity_Quaternion” が正常に書き込まれたかを確認します。
UHUpdaterには、独自のシリアルモニタが付いています。まず、Devicesリストから、確認したいUnlimitedHandを選んで下さい。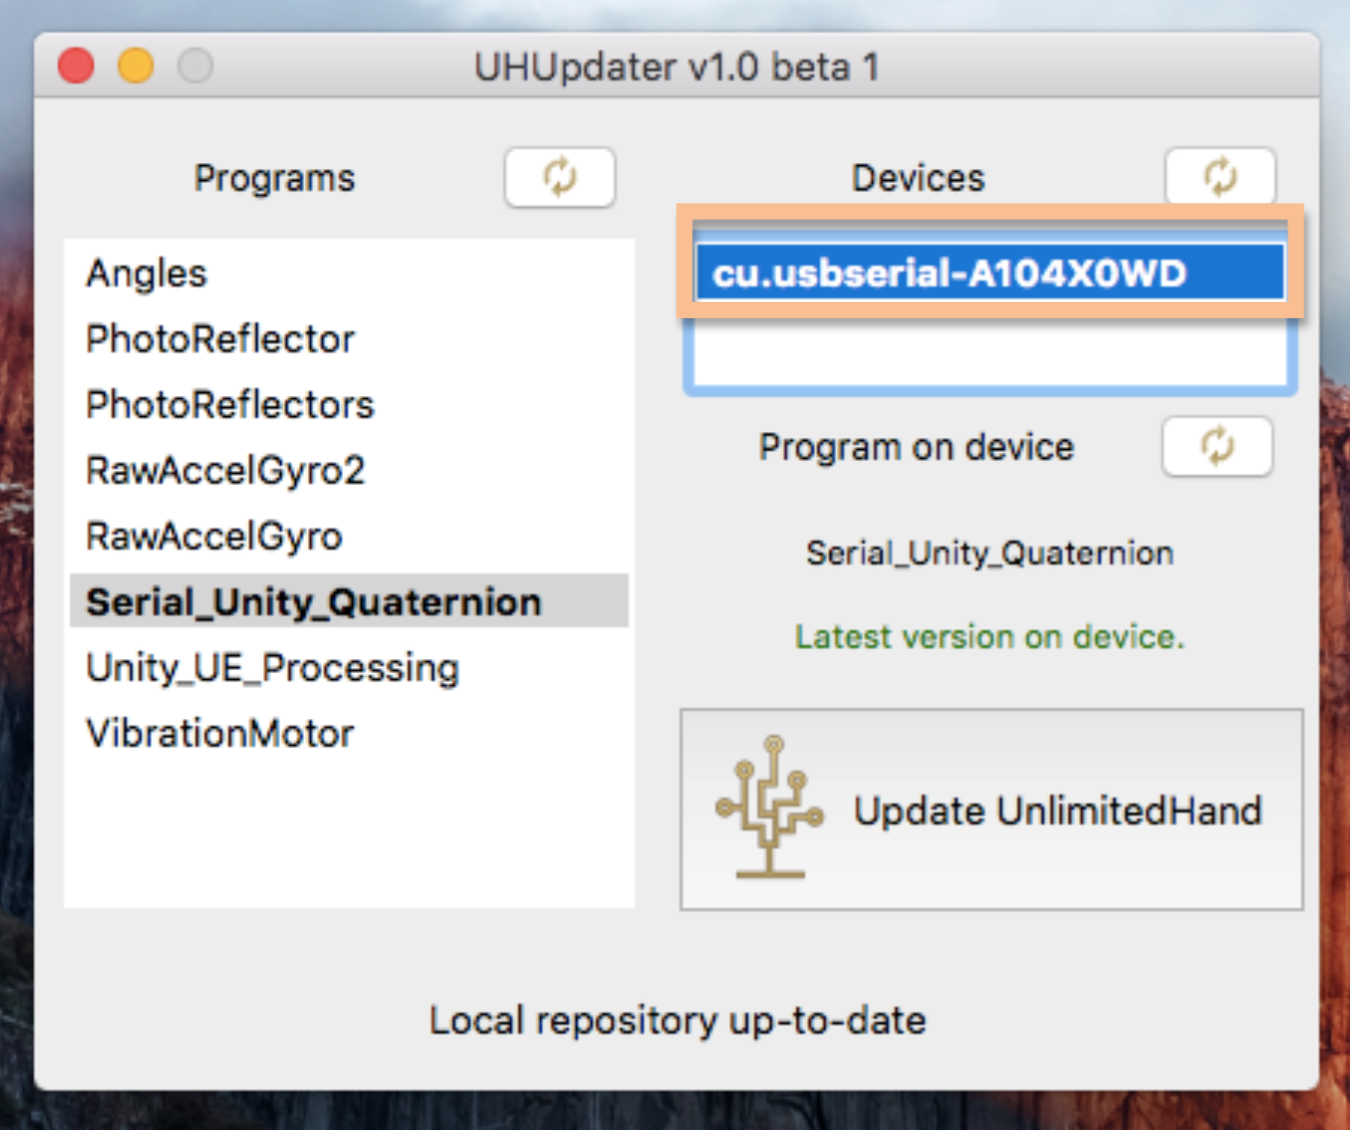
次に、メニューバーのTools からSerial Monitorを選んで下さい。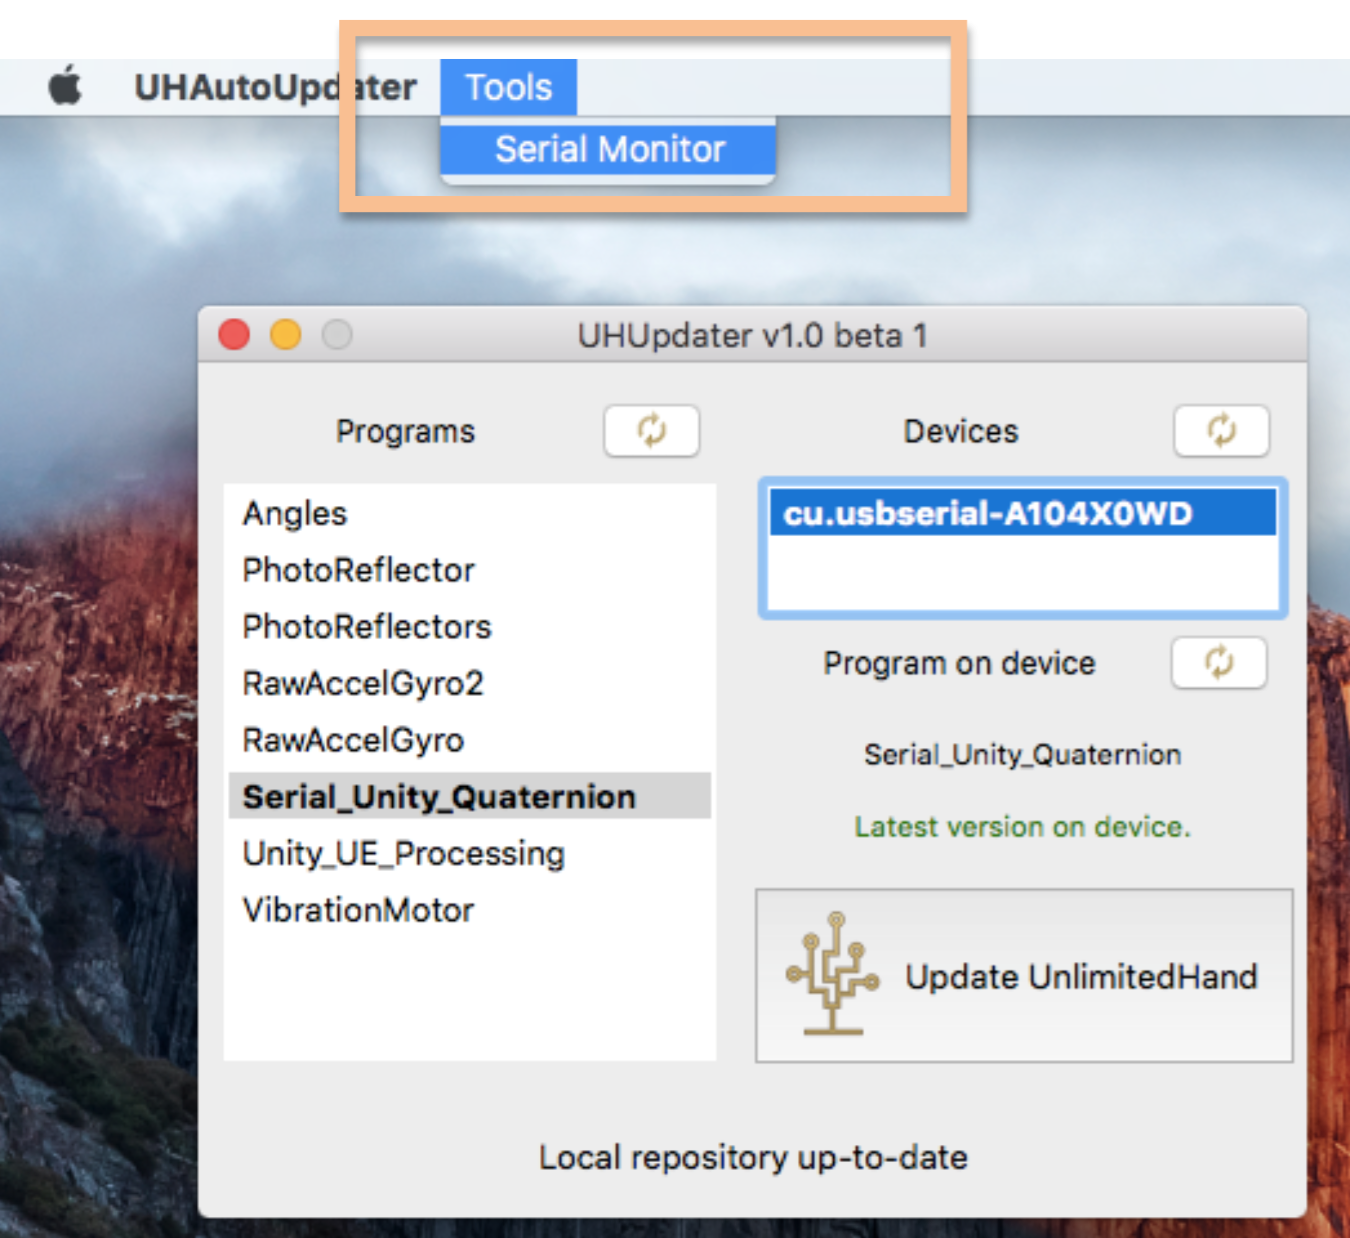
UnlimitedHandは、接続を確認すると少し振動します。数秒後、シリアルモニタのウィンドウが表示されます。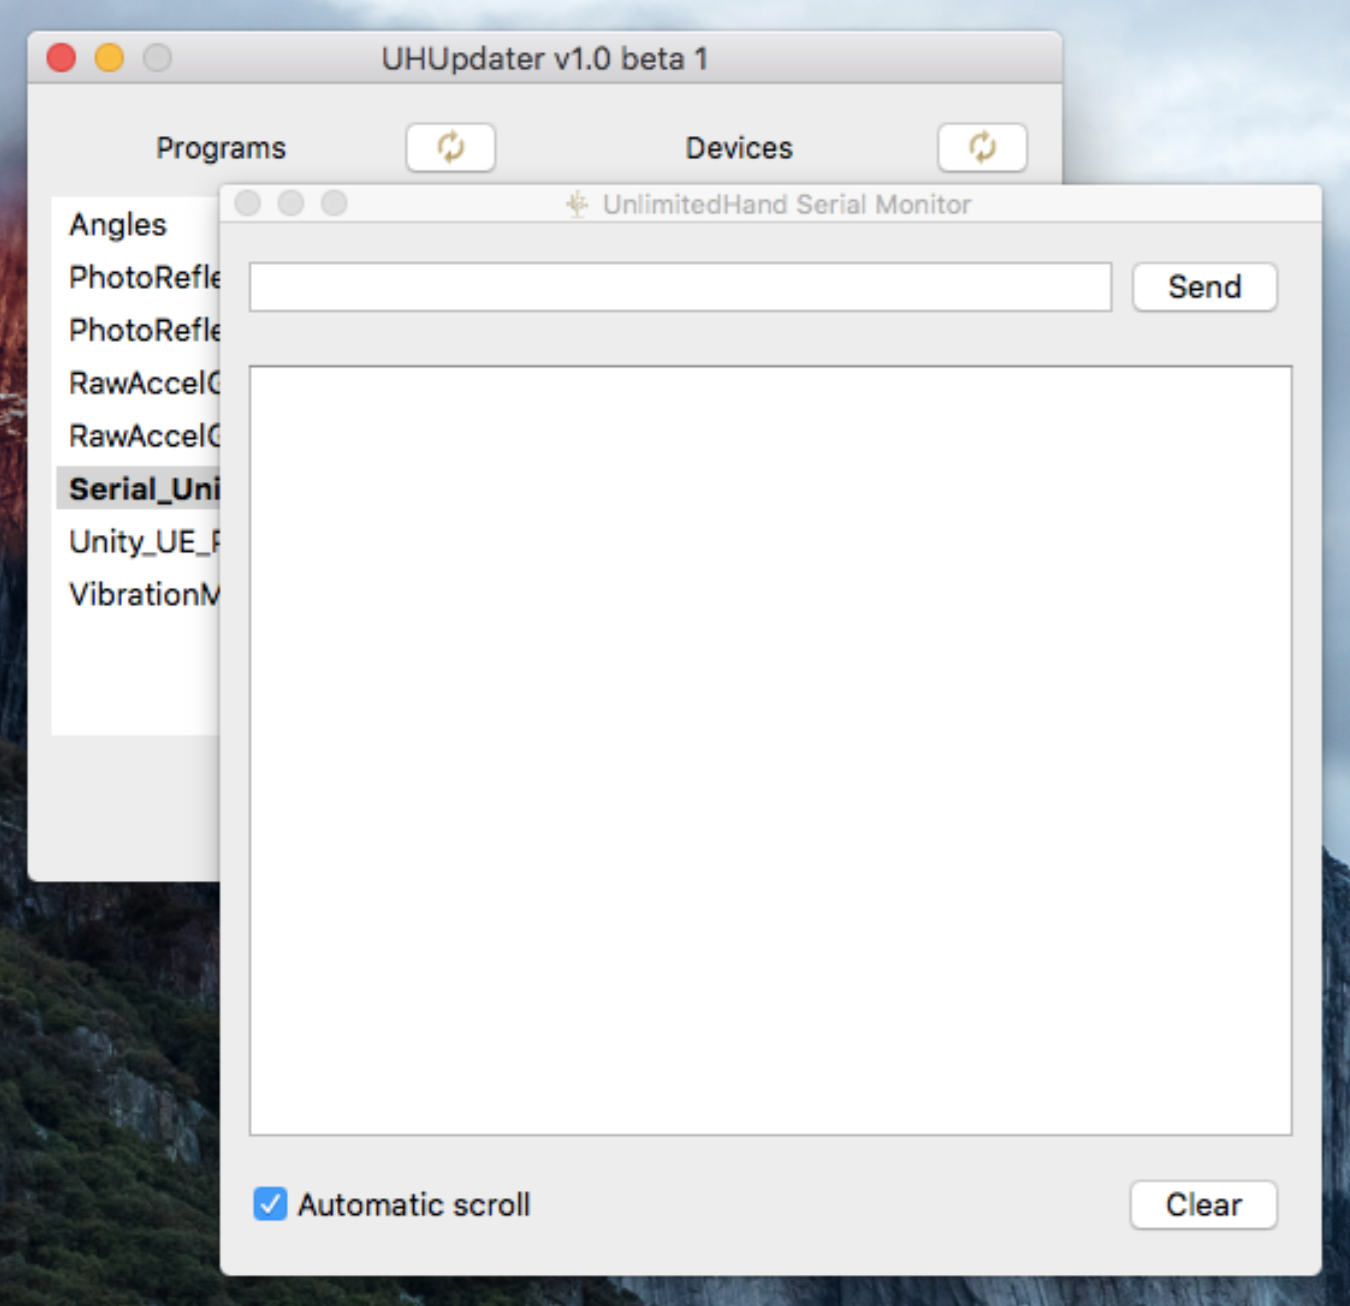
上の入力欄に、コマンドを入力することで動作の確認ができます。今回はqのコマンドを入力します。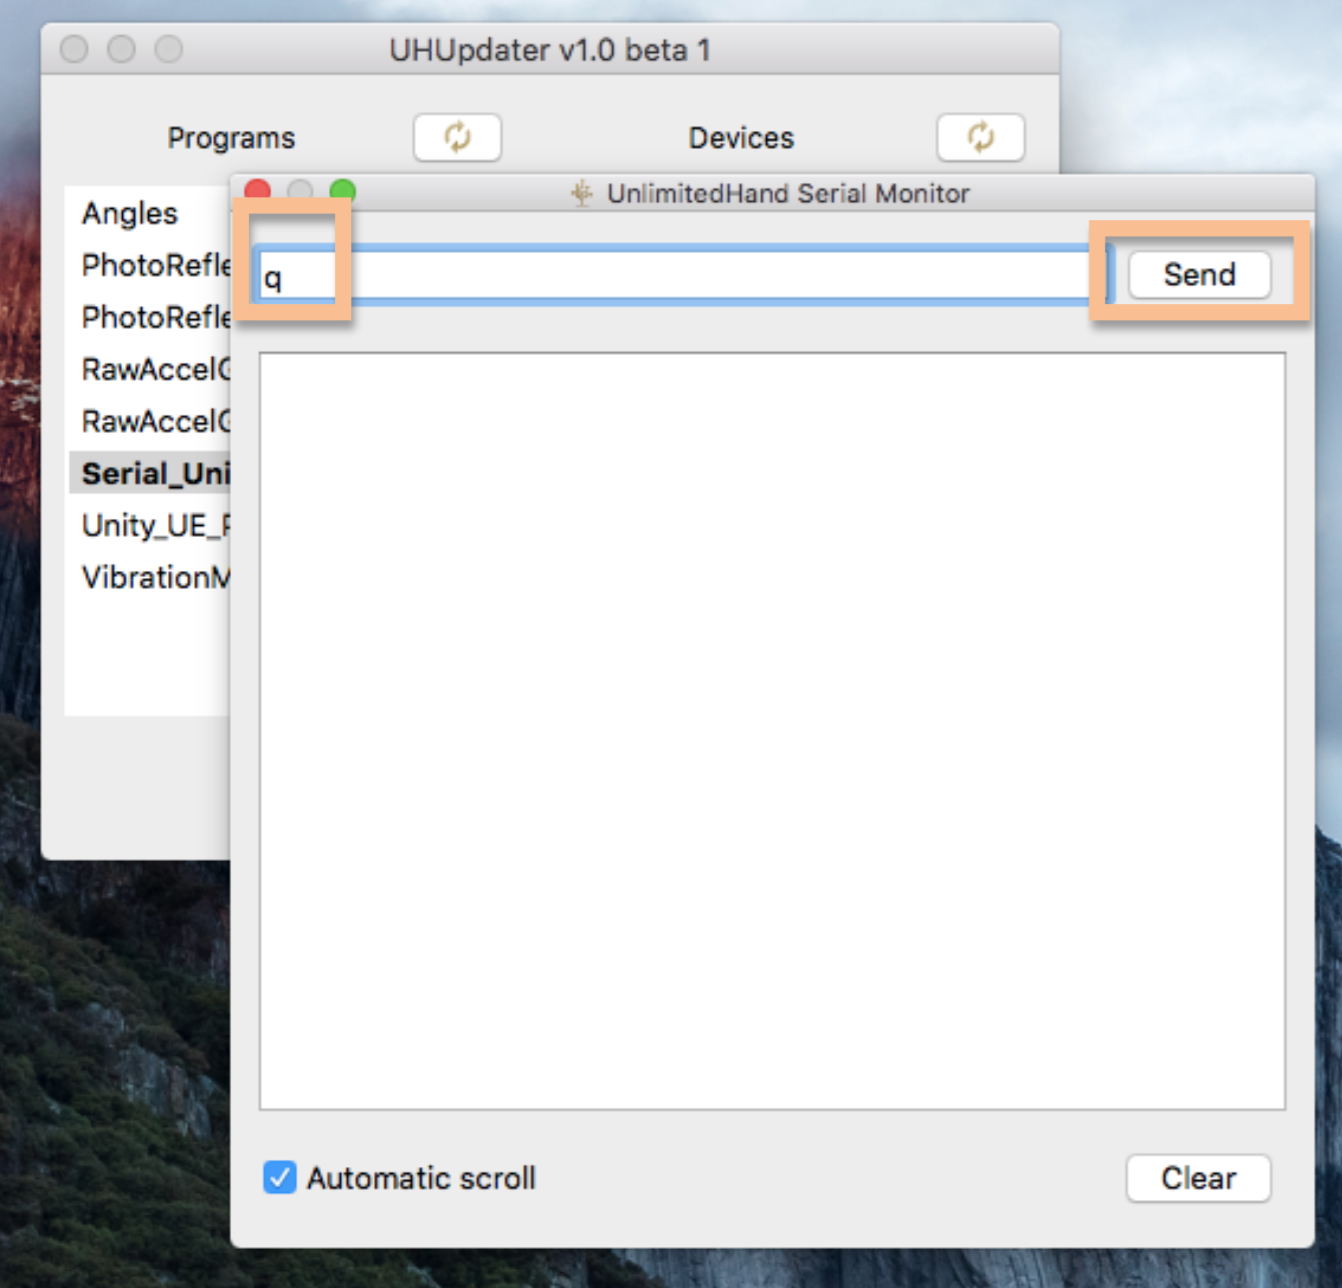
入力欄にqを入力し、エンターキーまたは、 “Send” ボタンをクリックすると、その文字がUnlimitedHandに送られます。
入力欄はリセットされ、下の出力欄にコマンドに応じた結果が表示されます。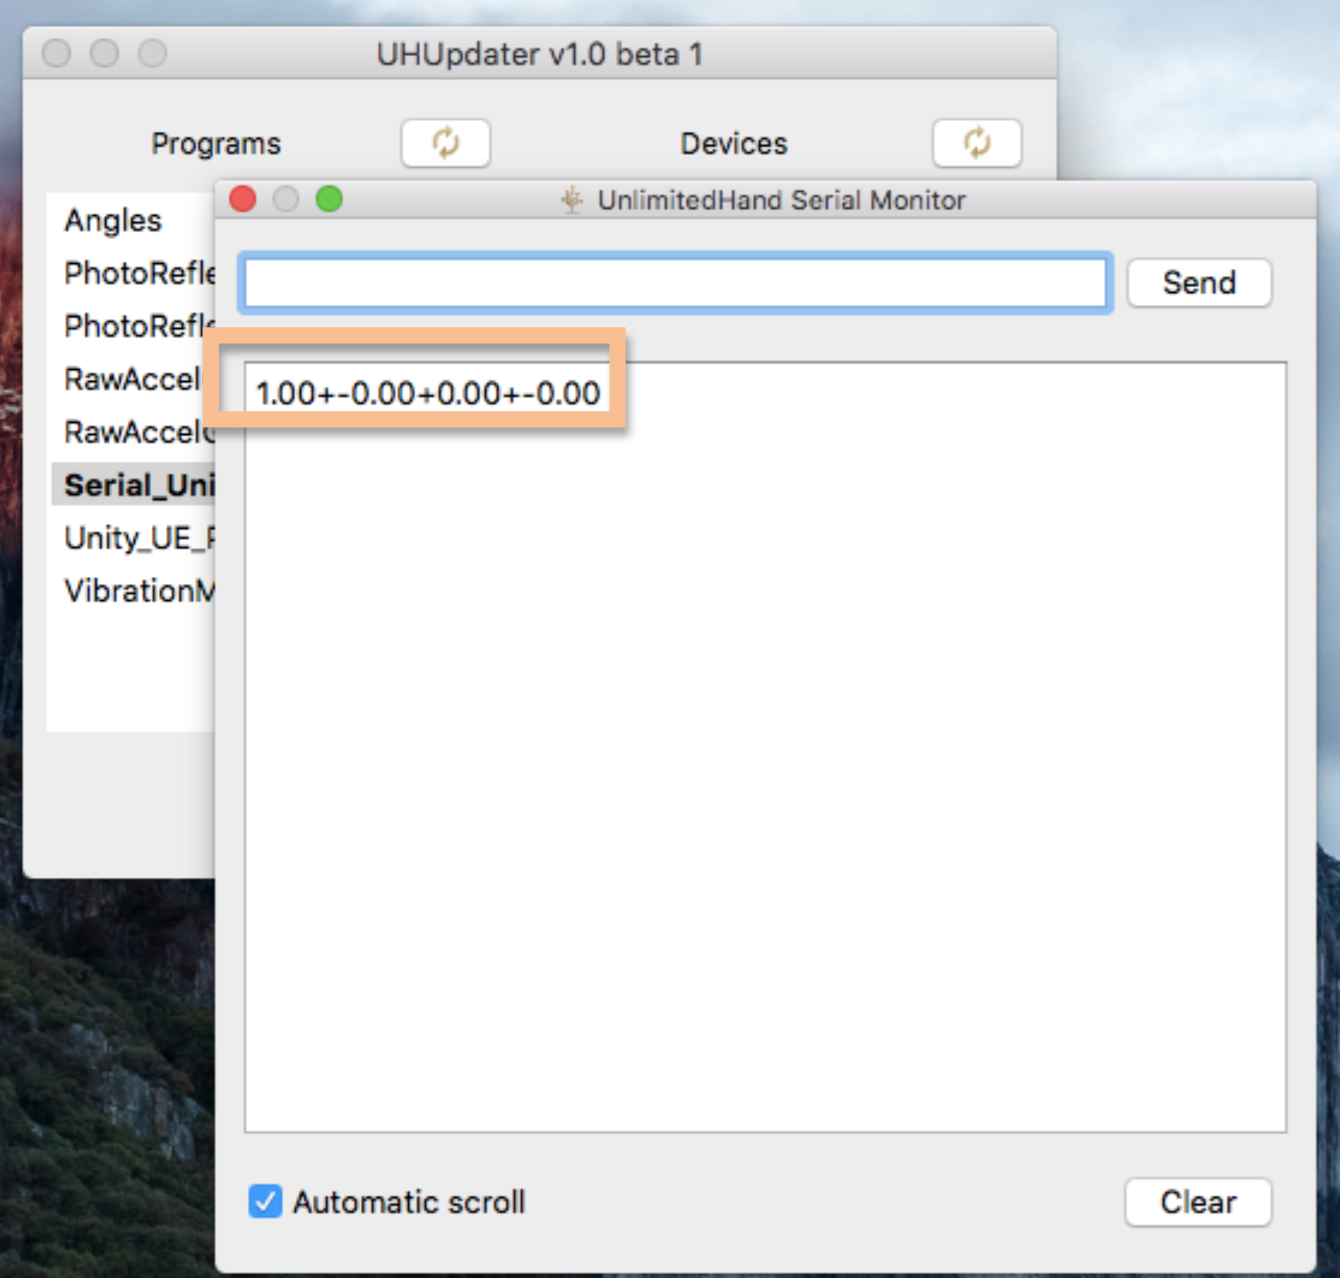